-
How to Implement Local Notification in an iOS Swift App in 3 Steps
almost 7 years ago
Local notifications are used to inform the user regarding some activity in an app. In the local notification, we don’t need any server. It triggers by the app itself at the scheduled time.
In this tutorial, we will learn how to schedule local notification, lets see how.
Suppose we want to schedule local notification on button click so we have to follow below steps.
Step 1: Do Settings
- In App delegate class writes below code in app didFinishLaunchingWithOptions method as done below. With the help of below lines, we inform the app which type of notification we want.
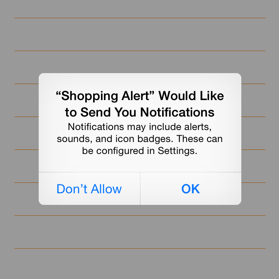
func application(application: UIApplication, didFinishLaunchingWithOptions launchOptions: [NSObject: AnyObject]?) -> Bool {

         if(UIApplication.instancesRespondToSelector(#selector(UIApplication.registerUserNotificationSettings(_:)))) {
            UIApplication.sharedApplication().registerUserNotificationSettings(UIUserNotificationSettings(forTypes: [.Alert, .Badge, .Sound], categories: nil))
        }

        return true
 }
Now when the app will launch user will get one alert which will ask for allow notifications or not. We have to select ‘OK’ here otherwise we won’t get notifications. Alert image will be as shown below;
Step 2: Schedule Local Notification
- Now in ViewController class, we are making a function which will set the time of notification.
 func setHourMinuteSecond(date: NSDate, hour: Int, minute: Int, second: Int) -> NSDate{

        let nsdate = NSCalendar.currentCalendar().dateBySettingHour(hour, minute: minute, second: second, ofDate: date, options: NSCalendarOptions(rawValue: 0))
        return nsdate!

   }
by using above function we can set notification's time according to our need.
- Suppose on button click we want to schedule notification so in button action method write below code.
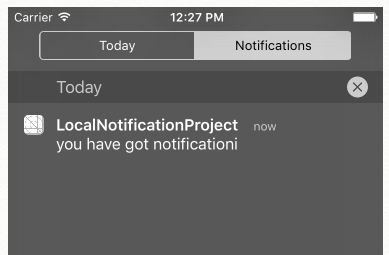
@IBAction setLocalNotification(sender: AnyObject) { let localNotification = UILocalNotification() let notiFicationDate = NSDate() //suppose for today i want to set notification let notificationDateAndTime = resetHourMinuteSecond(notiFicationDate, hour: 13, minute: 0 , second: 0) // we want to set notification at 1 Oclock localNotification.fireDate = notificationDateAndTime // on which date and time it has to be fired localNotification.alertBody = "you have got notificationi" // message which you want to display on notification localNotification.timeZone = NSTimeZone.defaultTimeZone() localNotification.repeatInterval = .Minute // if you want to repeat your notifications after one minute continuously, you can use this line localNotification.applicationIconBadgeNumber = UIApplication.sharedApplication().applicationIconBadgeNumber + 1 // this will increase badge count when we will receive local notification UIApplication.sharedApplication().scheduleLocalNotification(localNotification) // now final step is scheduling notification }- Now run the app and click your notification button. You will receive local notification at 1 P.M but if your app is active you won’t be able to see that but yes you can see on your screen.
- If you want to see a notification on your app screen you can do it by displaying an alert once you get the notification, this alert will come. Add below two methods in app delegate class for an alert.
func application(application: UIApplication, didReceiveLocalNotification notification: UILocalNotification) {
        // This method calls when user receives local notification so to handle this we are displaying alert here

        showAlertAppDelegate("Notification", message: "you have got a notification", buttonTitle: "Ok")

    }

    func showAlertAppDelegate(title : String,message : String,buttonTitle : String){
        let alert = UIAlertController(title: title, message: message, preferredStyle: UIAlertControllerStyle.Alert)
        alert.addAction(UIAlertAction(title: buttonTitle, style: UIAlertActionStyle.Default, handler: nil))
        self.window!.rootViewController?.presentViewController(alert, animated: true, completion: nil)
    }
Step 3: Cancelling Local Notifications
- For cancelling all local notification you can use below code. I have done this on another button click action method.
 @IBAction cancelLocalNotification(sender: AnyObject) {

   UIApplication.sharedApplication().cancelAllLocalNotifications()

}
In this way we can use Local notification. Hope you like the article! Share the feedback and concerns in the comment section below.


0 Comment(s)