-
How to create custom component in joomla ?
over 7 years ago
Hello Readers,
This blog shows the creation of custom component in Joomla.
Here we show the name of the component (mycomponent) as an example.
Step1: Create the name of the component com_mycomponent inside the Joomla component folder. (Here mycomponent is the name of the component).
Step2: Inside com_mycomponent component create the file called mycomponent.php (Here the name of the file is same as the name of component).
Example code : mycomponent.php
// No direct access to this file
defined('_JEXEC') or die('Restricted access');

// Get an instance of the controller prefixed by HelloWorld
$controller = JControllerLegacy::getInstance('Mycomponent');

// Perform the Request task
$input = JFactory::getApplication()->input;
$controller->execute($input->getCmd('task'));

// Redirect if set by the controller
$controller->redirect();
Step3: After that inside the com_mycomponent component create the file called mycomponent.xml.(Here name of the xml file is also the same as the name of component).
Example code : mycomponent.xml
<?xml version="1.0" encoding="utf-8"?>

<extension type="component" version="3.2.0" method="upgrade">

    <name>MyComponent!</name>
    <!-- The following elements are optional and free of formatting constraints -->
    <creationDate>Aug 2016</creationDate>
    <author>Nishant</author>
    <authorEmail>nishant@gmail.com</authorEmail>
    <authorUrl>http://www.example.org</authorUrl>
    <copyright>Copyright Info</copyright>
    <license>License Info</license>
    <!--  The version string is recorded in the components table -->
    <version>0.0.7</version>
    <!-- The description is optional and defaults to the name -->
    <description>Description of the MyComponent component ...</description>

    <install> <!-- Runs on install -->
        <sql>
            <file driver="mysql" charset="utf8">sql/install.mysql.utf8.sql</file>
        </sql>
    </install>
    <uninstall> <!-- Runs on uninstall -->
        <sql>
            <file driver="mysql" charset="utf8">sql/uninstall.mysql.utf8.sql</file>
        </sql>
    </uninstall>
    <update> <!-- Runs on update; New since J2.5 -->
        <schemas>
            <schemapath type="mysql">sql/updates/mysql</schemapath>
        </schemas>
    </update>

    <!-- Site Main File Copy Section -->
    <!-- Note the folder attribute: This attribute describes the folder
        to copy FROM in the package to install therefore files copied
        in this section are copied from /site/ in the package -->
    <files folder="site">
        <filename>index.html</filename>
        <filename>mycomponent.php</filename>
        <filename>controller.php</filename>
        <folder>views</folder>
        <folder>models</folder>
    </files>

    <administration>
        <!-- Administration Menu Section -->
        <menu link='index.php?option=com_mycomponent'>My Component!</menu>
        <!-- Administration Main File Copy Section -->
        <!-- Note the folder attribute: This attribute describes the folder
            to copy FROM in the package to install therefore files copied
            in this section are copied from /admin/ in the package -->
        <files folder="admin">
            <!-- Admin Main File Copy Section -->
            <filename>index.html</filename>
            <filename>mycomponent.php</filename>
            <filename>controller.php</filename>
            <!-- SQL files section -->
            <folder>sql</folder>
            <!-- tables files section -->
            <folder>tables</folder>
            <!-- models files section -->
            <folder>models</folder>
            <!-- views files section -->
            <folder>views</folder>
        </files>
    </administration>

</extension>
Step4: After creating xml then we create the model folder within com_mycomponent and create file mycomponent.php.Example code : mycomponent.php
class MycomponentModelMycomponent extends JModelList
{
    //write here database Query
}
Step5: After that create the file controller.php within com_mycomponent component.
Example code : controller.php
class mycomponentController extends JControllerLegacy
{
    protected $default_view = 'mycomponent';
}
Step6: After that create the views folder within com_mycomponent component like views->mycomponent->view.html.php.
Example code : view.html.php
class MycomponentViewMycomponent extends JViewLegacy
{

function display($tpl = null)
    {
    parent::display($tpl);
    }
}
The above steps are used to make the the components files and folders after completing this we use to installing the component from joomla administrator.
Installing our custom component (com_mycomponent)
Step1:Login into joomla administrator
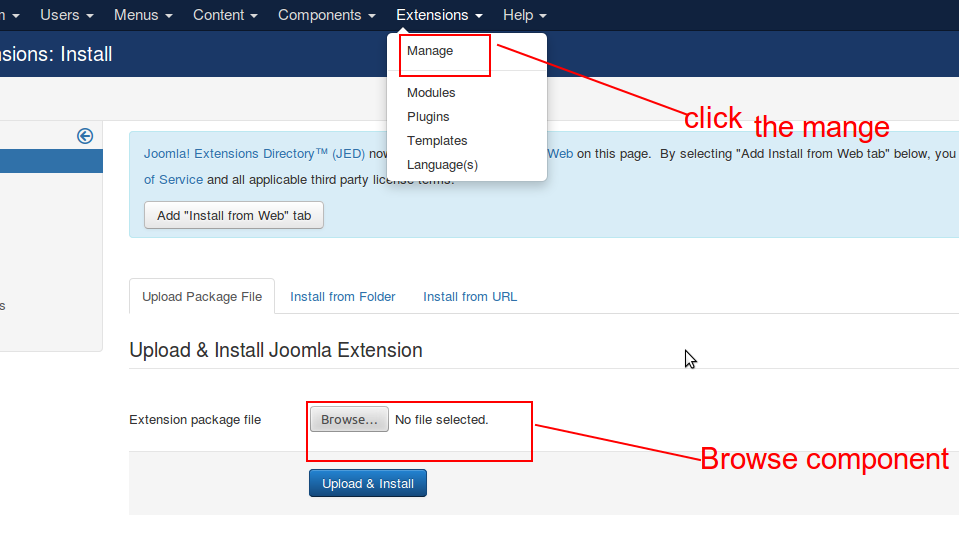
Step2:In the top menu in joomla administrator, click Extensions and then click Manage and install the component.
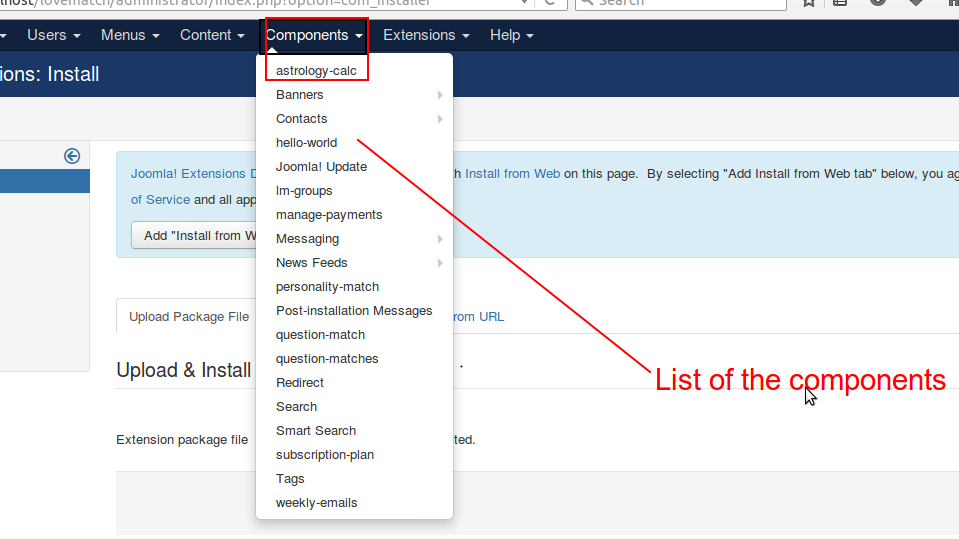
Step3: In the top menu in Joomla administrator, click Components we will see
com_mycomponent show in the list.


-
over 5 years ago
i am not understand this code
-

1 Comment(s)