-
ASP.Net MVC-What's inside-Part1
about 11 years ago
The previous article shows a conceptual flow in ASP.Net MVC framework. There we saw that the controller is the central point of execution in MVC.And as you have gone through two theoretical articles on MVC flow, I think you've understood why controller is called a "Controller".
Now we'll try to touch the surface of MVC by knowing the project architecture provided by Microsoft. I'll say "touch" because if you think that you know web forms and you are just migrating to MVC by knowing the architecture,you are completely wrong. It is a whole new path. It is fast in execution,but studying the provided project architecture might prove tiresome.
Now it is obvious to think that I am driving you to a totally different development methodology after making you excited about MVC in previous articles, but this is the way to go for learning.
For Example:-Ferrari sports car is lot faster than your car (If you don't use a super car for daily commuting) but it requires a lot of complex systems to gain that speed. So sometimes we need to change our idea and put extra effort to get the performance we want and definitely it is not as hard as making a Ferrari.So let's start.
Here one question may arise:-
Where are those controllers, models and views I was talking about? Need answer? Start Visual Studio(I am on VS 2013).
Go to File->New Project
In the window click the "Web" option(I'll tell about the VS 2012 option too). In the middle window select the Asp.net Web Application.
Change the name and location of the project as you wish in the textboxes given below and click OK.
The steps are as follows if you are not getting the interface of VS 2013.
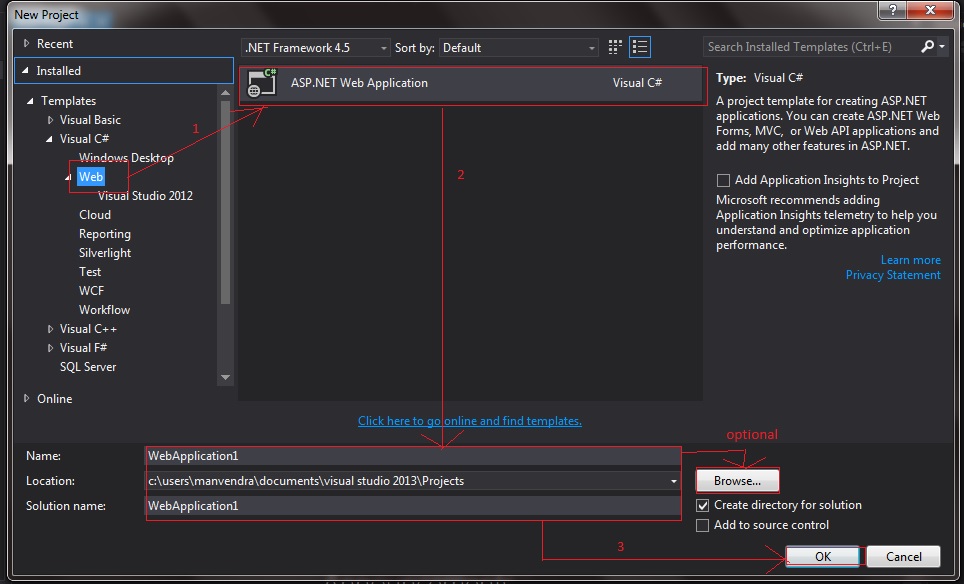
Fig.1-New Project
Now you get an interface like following: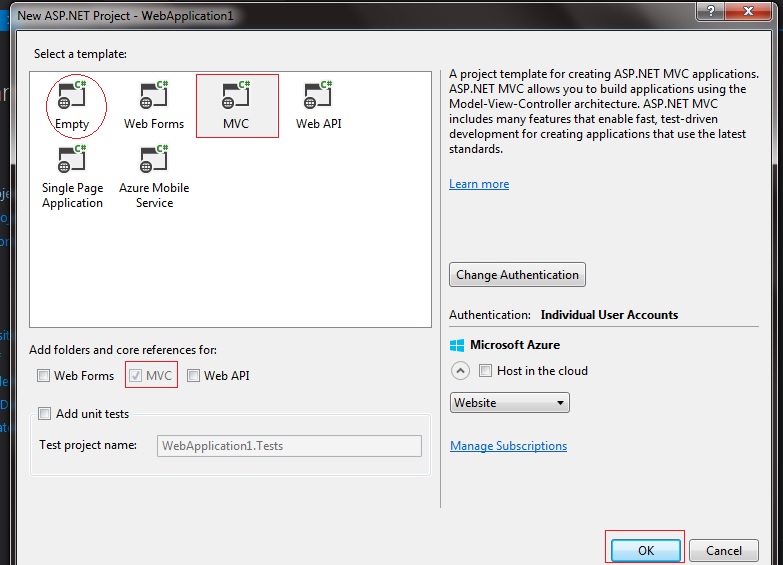
Fig.2-Select Project Type Here we get multiple options like:-
Empty
Web Forms
MVC
Web Api
Single Page Application
Azure Mobile Service
To keep it focused and short, we'll discuss about "Empty" and "MVC" here.
Empty:-
This is the skeleton format of any project in Asp.Net and that skeleton depends upon what check box you are selecting. For example if you select web forms,you get completely empty architecture in solution explorer with only web.config file. If you select MVC check box,you'll get the all the folders for an MVC architecture but there will be no supporting files like jQuery etc.MVC:-
This is the complete architecture of an MVC project and you get a basic template of an MVC project and you can just run that to show the home page.(Makes you feel like you've created on MVC project in one go,but believe me you didn't even have scratched the surface yet). But this project is very helpful in understanding the MVC architecture.(There are other check boxes enabled like web forms,webApi,unit tests,but we'll stick to MVC for now).
Make sure that the disabled MVC check box is the only one which is checked. After clicking Ok button you get the interface like following.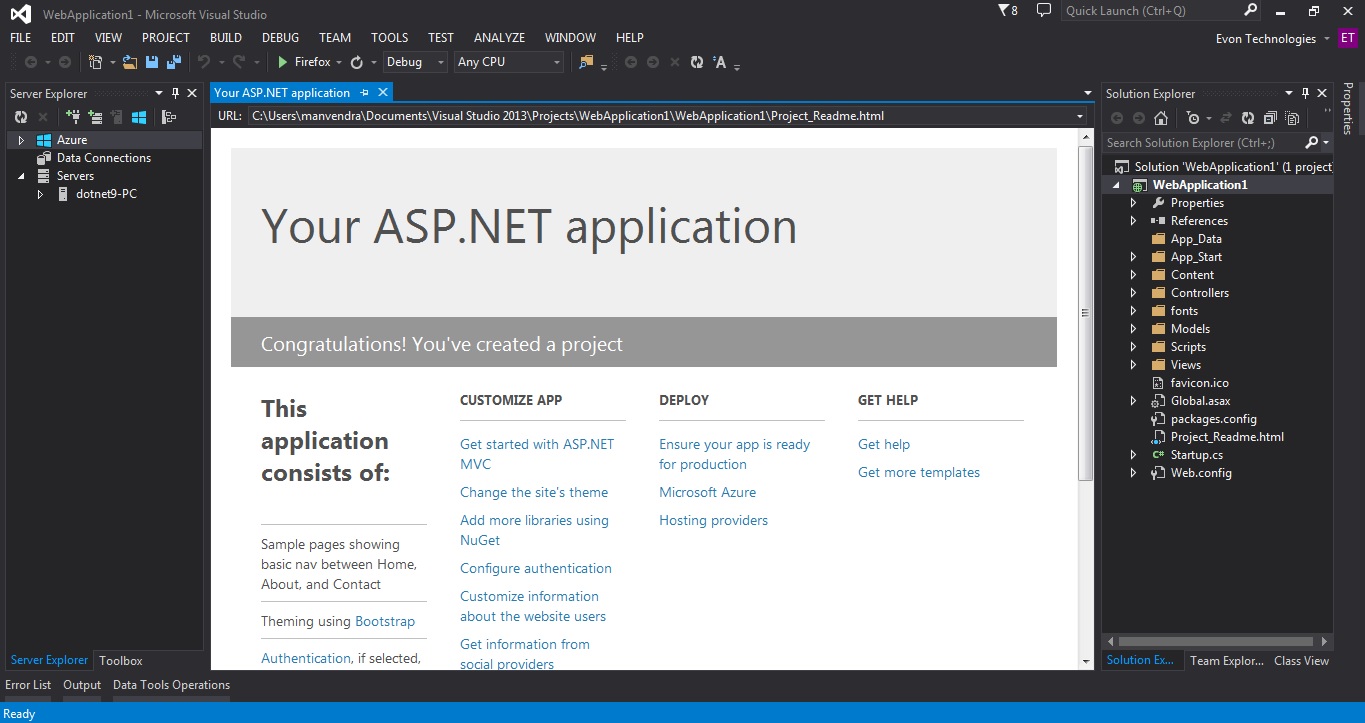
Fig.3-New MVC Application
And here you got your "Your ASP.NET application". Now what? Run it(f5). Following screen appears.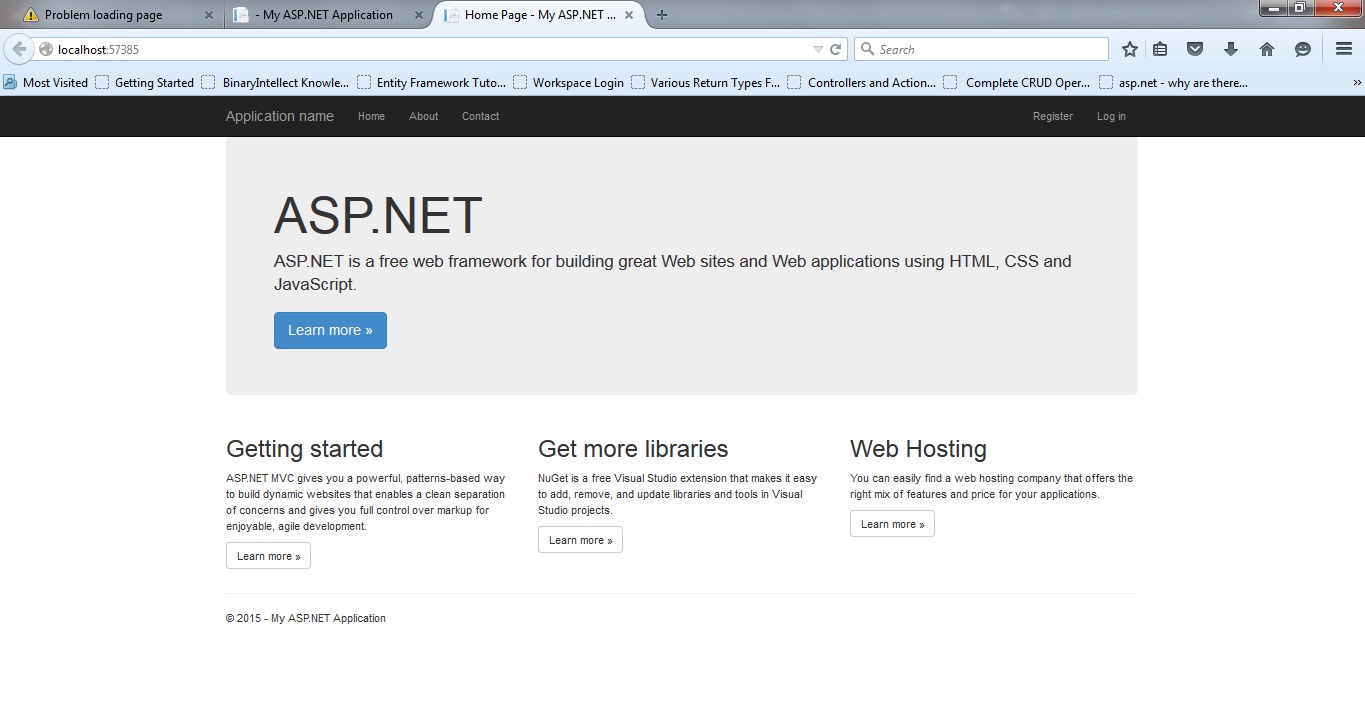
Fig.4-New MVC Application(Running)
Congratulations! You've got your first MVC application running. Now if the celebrations are over let's take a look on the URL part of the browser. What's missing? You got no page name. Why? How are we getting this page then?
Remember routing we talked about? It is the same thing at work. How? We're here to see the same thing.
Now close the browser and press Shift+F5 if debugging hasn't stopped already and let's take a look at the solution explorer. You see something like following:
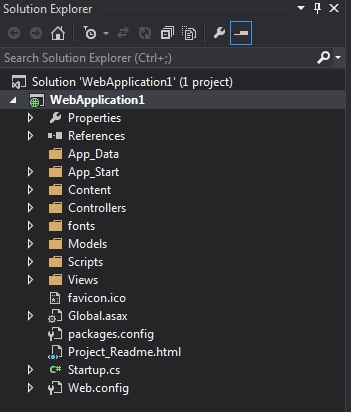
Fig.5-The Solution Explorer-Showing All Files in MVC Structure
Folders,folders and folders. And I am damn sure that the folders are not going to be less than that for any MVC project you create in future. You'll add one or two more and you'll see that in your real projects. Let's start with App_Data.
App_Data:-
The purpose of the folder is same as it was in Asp.Net web forms. It contains the data files(local) for project. That may be an .MDF ,.SDF or XML etc.
App_Start:-
It contains a number of class files as following:-
1-BundleConfig.cs
2-FilterConfig.cs
3-IdentityConfig.cs
4-RouteConfig.cs
5-StartupAuth.cs
For now we'll get only a brief description of the files. The connection among these files are explained later in the article.
1-BundleConfig.cs:-
This file contains all the references to script files. As this is MVC, the idea of referencing an script file is changed. It is focused towards a faster execution and a concept called "Minification and Bundling". For now we can understand the bundling and minification as converting the script files into a bundle to send them in one go to reduce request response cycle,rather than having 1 request for each of the file sent over the network.
2-FilterConfig.cs:-
This file is used to register MVC filters which are global to any MVC project. And filters are nothing but C# attributes with their logic implemented specific to the MVC requirements. Now for C# attributes you need to google it,and you'll get plenty of resources about them.3-IdentityConfig.cs:-
It is a file which handles configuration of ASP.Net Identity which is an improved Membership-provider. For more details please refer following link http://www.asp.net/identity/overview/getting-started/introduction-to-aspnet-identity4-RouteConfig.cs:-
Remember routing we talked about? We regarded it as an important process of MVC execution. So this routing configuration is defined in this file. When you open it, you get registerRoute method which defines the way a route is defined with a name Default. Here you can modify the parameters to change the default route and even add your routes.
For example:-
Default Route:-
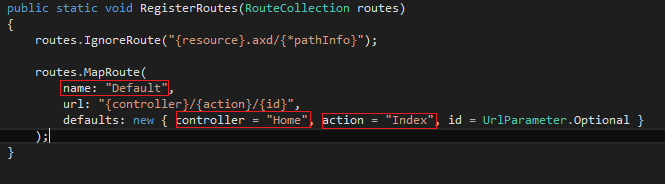
Fig.6-Default Route in RouteConfig.cs
This default route definition tells that the first controller will be home of which Index method will be executed for the request.
We can change it for our interest. In controller we can change the controller name (like blog) and action name(like post). As this is named "Default" so we hit the post method of blog controller when we start the MVC application.
Apart from that we can define a new route too. Like following:-
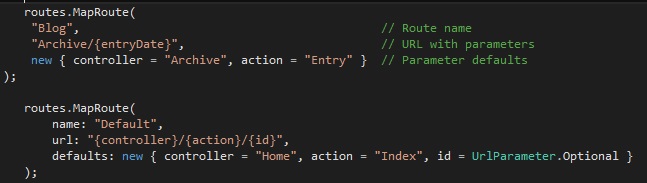
Fig.7-Custom Routes in RouteConfig.cs
Take a look at the first route definition. It's name is blog which routes to the Entry method of Archive controller. And the execution sequence is really important here. The routes are requested in the order they are written.
5-StartupAuth.cs:-
This file contains basic configuration for your authentication system, and allows you to specify which type you want to use(type here means forms,windows or passport). In this file we can also find the commented code for Facebook,Twitter,Google and Microsoft login. The how part of this is out of scope of this article so we'll see that later.
So above described files of App_start folder are given to you by default when you create an MVC project. For a start in MVC take a look at bundleConfig.cs and routeConfig.cs in detail if you like otherwise we'll discuss it in subsequent articles.
After the App_Start folder we get following folders apart from Models,Views and Controllers:
Content:-You see some CSS files in here. It is used to keep CSS ,and all other content like images etc. Anyways you can put images in a separate folder too and that's up to you.
Fonts:- Here font files are kept which are referenced in CSS file.
Scripts:-You can put all of your java script files here whether they are any third Party library files or your custom java script files.
The rest of the files will be described in the next part(Part-2) of same article as I don't want to make it too long and boring.
Thank You.


0 Comment(s)