In the following blog, we will learn how to setup your machine to get started with Visual Studio Code and .NET Core. We'll also create a simple ASP.NET Core Web application to get a glimpse of how to execute tasks using commands provided in Command Line Interface (CLI) tools.
Following installations are required to start with .NET Core in Visual Studio Code
- Download and install Visual Studio Code
- Download and install .NET Core SDK
- Install the C# extension for Visual Studio Code
After you have installed Visual Studio Code and .NET Core SDK, you may follow the below steps to install C# extension in Visual Studio Code.
Steps to install C# extension in Visual Studio Code:
Go to View > Extensions like in the following image.
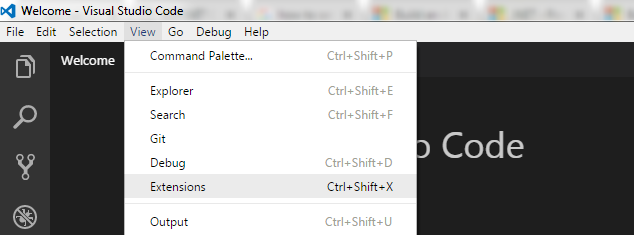
Now you will see the list of extensions from which just select the C# for Visual Studio Code and click on Install button.

Thereafter you may get prompt message to Reload, so the extension will get available to use within the editor, click Reload button and you are done with installing C# extension. This will happen for the first time only, thereafter this extension will be available in the editor unless you choose to Uninstall it.
So far we have installed all the required tools on our system, now let's see how to create a simple web application using .NET Core in Visual Studio Code.
Setup and run ASP.NET Core Web application in Visual Studio Code
- Press Ctrl + '`' (the back-quote character) or select View > Integrated Terminal to open an embedded terminal in Visual Studio Code.
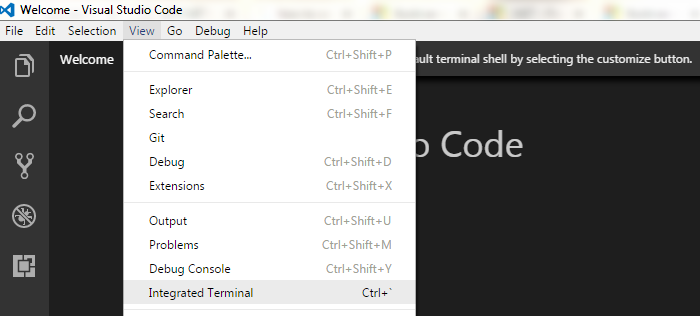
- In the terminal, first we need to navigate to the folder where we will create our web application. For example, I want to set "VSCode" inside D: drive as the current folder and currently I am in "C:\Users\Ajendra" directory. To change directory, I'll run the following commands.
Microsoft Windows [Version 6.1.7601]
Copyright (c) 2009 Microsoft Corporation.  All rights reserved.

C:\Users\Ajendra>cd D:
D:\

C:\Users\Ajendra>D:

D:\>cd VSCode

D:\VSCode>
-
To initialize a simple ASP.NET Core Web application, we will use dotnet new command provided in .NET Core command-line interface (CLI) tools.
Basic usage of dotnet new command including the options and arguments can also be figured out from the following image.
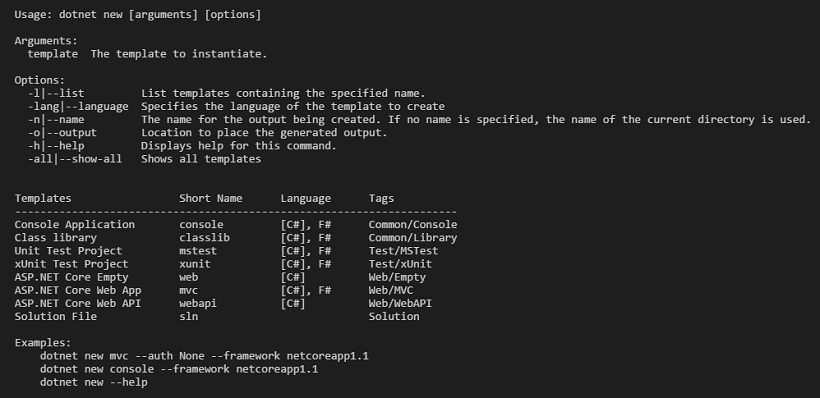
So let's run following command to create a web application, which will add required files in the current folder.
dotnet new mvc
Above command adds following files in the current folder.
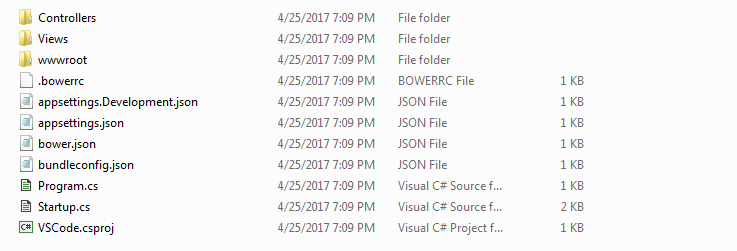
- Next step will be to run our web application which is done by the following command.
dotnet run
But if you run this command you might get lots of error messages like in the following image.

The reason for these errors is that we haven't yet restored the dependencies and tools of our web application. In the above image, you can see messages like missing "System" namespace because Step 3 just created a code file but didn't restored the required packages that are getting referenced. Let's discuss it in next step.
-
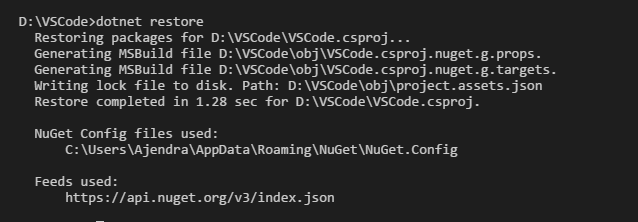
Run the following command to restore the dependencies in the web application.
dotnet restore
Running restore command will restore the required packages and generate other build files. The command output could be like in the following image.
-
Now let's run our web application using the following command.
dotnet run
Output:

Now if you move your mouse over http://localhost:5000, you will get tool-tip message like

Keep pressing Ctrl button and click over the link which will take you to the browser running your application.
In the same way, we can create other types of projects like Console Application, ASP.NET Core Web Api, Class Library and so on. Hope it helps you.
Happy Coding !
0 Comment(s)