-
Resuable Template in ASP.NET
over 11 years ago
Introduction
In Visual Studio we have a built-in Web Form template to use, which we further change according to our need. But there may be case, when we want to have a custom template that we want to design as per our requirement and reuse it while development.
To start with creating our own customized template for resuse, we need to proceed as follows:
Step 1 :
Open Visual Studio 2013 and select New Project on start page or select File -> New -> Project as shown in below image
Step 2:
Form the templates on the left side select Visual C# -> Web and on the right side select ASP.NET Web Application and select the location for this application as shown in below image.

Step 3:
From the dialog box select Empty as a template for the application as shown in below image.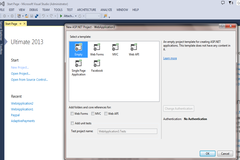
Step 4:
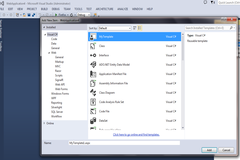
From the Solution Explorer on the right side, right click on the template and select Add -> New Item as shown in below image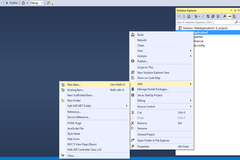
Step 5:
Select the WebForm and give it a name of your choice, I keep the default one WebForm1.aspx as shown in below image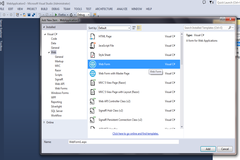
Step 6:
In the markup view of the newly created Web Form set the <title> value as "My Title" and add <h1>Hello everyone this a web form</h1> inside the div tag which is inside form tag. This is what we want to appear when we will use this template for our applications in future as shown in below image.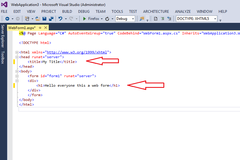
Step 7:
Now save all your changes and Select Filer -> Export Template.... as shown in below image
Step 8:
From the Choose Template dialog box select Item Template from the radio buttons and from the Dropdown box select the project which is WebApplication3 in our case as shown in below image.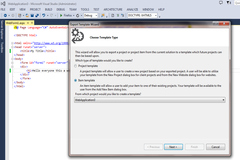
Step 9:
Now from the Export Template Wizard dialog box select the item from the project selected in Step 8 to be exported as template for reuse. Click next as shown in below image.Step 10:
From the Select Item Reference dialog box select nothing and Click next as shown in below image.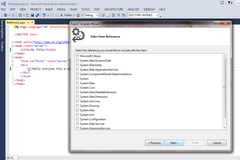
Step 11:
From Select Template Option dialogue box give template name and template description as of your choice, in our case we have given template name as MyTemplate and template description as Reusable template. Select both the checkboxes in the dialogue box and click Finish as shown in below image.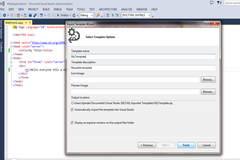
Step 12:
Now check if the zipped folder exists in the location "C:\Users\UserName\Documents\Visual Studio 2013\Templates\ItemTemplates" with the template name we choose earlier.Step 13: Now right click on Project Template and select Add -> New Item and we will see or template has been added in Visual C# we can also see the description we gave while creating it. We'll keep the default name which is MyTemplate1.aspx and select Add as shown in below image.
Step 14:
You might get a warning box, to continue click Trust as shown in below image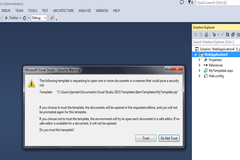
Step 15:
We get the template elements already added what we set while creating this template.Now you have your own Page Template to use.......


0 Comment(s)