-
Setting up enviornment for Angular 2 project in Visual Studio
over 9 years ago
Ever wondered how to start with setting up environment for a simple Angular 2 project, here are following steps that you may follow to get it done easily.
- Open Visual Studio and create a new ASP.NET Empty Web Site.
- Provide it with a location path. I have provided it location as "D:\angular2-getting-started".
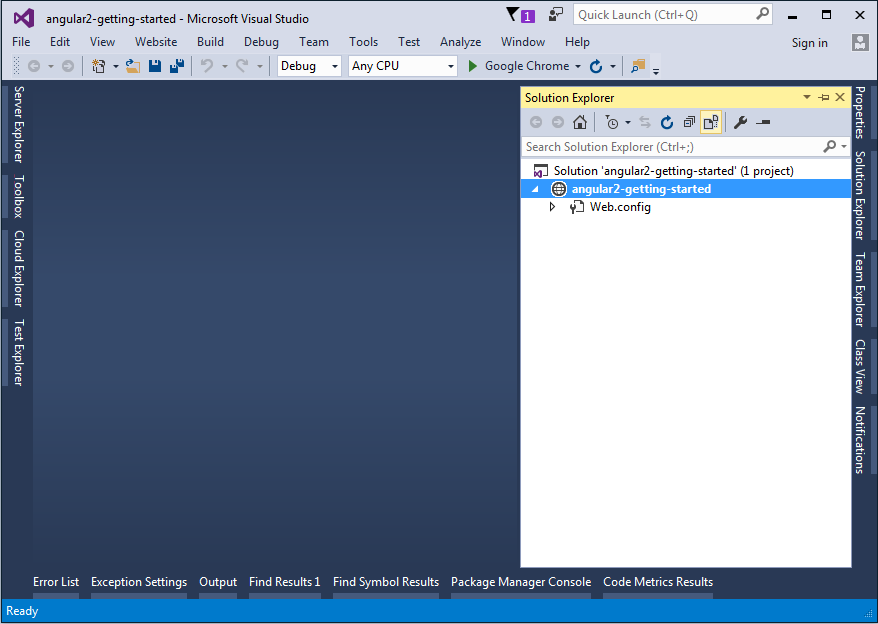
Now solution explorer will look like the following image.
Now let's add following four files one by one in the website.
- package.json
{ "name": "angular-sample", "version": "1.0.0", "scripts": { "start": "tsc && concurrently \"tsc -w\" \"lite-server\" ", "lite": "lite-server", "tsc": "tsc", "tsc:w": "tsc -w" }, "licenses": [{ "type": "MIT", "url": "https://github.com/angular/angular.io/blob/master/LICENSE" }], "dependencies": { "@angular/common": "~2.2.0", "@angular/compiler": "~2.2.0", "@angular/core": "~2.2.0", "@angular/forms": "~2.2.0", "@angular/http": "~2.2.0", "@angular/platform-browser": "~2.2.0", "@angular/platform-browser-dynamic": "~2.2.0", "@angular/router": "~3.2.0", "@angular/upgrade": "~2.2.0", "angular-in-memory-web-api": "~0.1.15", "core-js": "^2.4.1", "reflect-metadata": "^0.1.8", "rxjs": "5.0.0-beta.12", "systemjs": "0.19.39", "zone.js": "^0.6.25" }, "devDependencies": { "@types/core-js": "^0.9.34", "@types/node": "^6.0.45", "concurrently": "^3.0.0", "lite-server": "^2.2.2", "typescript": "^2.0.3" } } -
tsconfig.json
{ "compilerOptions": { "target": "es5", "module": "commonjs", "moduleResolution": "node", "sourceMap": true, "emitDecoratorMetadata": true, "experimentalDecorators": true, "removeComments": false, "noImplicitAny": false }, "compileOnSave": true, "exclude": [ "node_modules", "wwwroot", "Scripts/app" ] } -
systemjs.config.js
/** * System configuration for Angular samples * Adjust as necessary for your application needs. */ (function(global) { System.config({ paths: { // paths serve as alias 'npm:': 'node_modules/' }, // map tells the System loader where to look for things map: { // our app is within the app folder app: 'app', // angular bundles '@angular/core': 'npm:@angular/core/bundles/core.umd.js', '@angular/common': 'npm:@angular/common/bundles/common.umd.js', '@angular/compiler': 'npm:@angular/compiler/bundles/compiler.umd.js', '@angular/platform-browser': 'npm:@angular/platform-browser/bundles/platform-browser.umd.js', '@angular/platform-browser-dynamic': 'npm:@angular/platform-browser-dynamic/bundles/platform-browser-dynamic.umd.js', '@angular/http': 'npm:@angular/http/bundles/http.umd.js', '@angular/router': 'npm:@angular/router/bundles/router.umd.js', '@angular/forms': 'npm:@angular/forms/bundles/forms.umd.js', '@angular/upgrade': 'npm:@angular/upgrade/bundles/upgrade.umd.js', // other libraries 'rxjs': 'npm:rxjs', 'angular-in-memory-web-api': 'npm:angular-in-memory-web-api/bundles/in-memory-web-api.umd.js' }, // packages tells the System loader how to load when no filename and/or no extension packages: { app: { main: './main.js', defaultExtension: 'js' }, rxjs: { defaultExtension: 'js' } } }); })(this); -
typings.json
{
  "globalDependencies": {
    "core-js": "registry:dt/core-js#0.0.0+20160725163759",
    "node": "registry:dt/node#6.0.0+20160831021119"
  }
}
Creating app folder and adding its content
Now let's add a new folder "app" in the website and add few TypeScript and other files inside it.
- main.ts
import { platformBrowserDynamic } from '@angular/platform-browser-dynamic'; import { AppModule } from './app.module'; import { enableProdMode } from '@angular/core'; platformBrowserDynamic().bootstrapModule(AppModule); - app.module.ts
import { NgModule } from '@angular/core'; import { BrowserModule } from '@angular/platform-browser'; import { FormsModule } from '@angular/forms'; import { HttpModule } from '@angular/http'; import { AppComponent } from './app.component'; @NgModule({ imports: [BrowserModule, FormsModule, HttpModule], declarations: [AppComponent], providers: [], bootstrap: [AppComponent] }) export class AppModule {}; - app.component.ts
import { Component } from '@angular/core'; @Component({ selector: 'my-app', templateUrl: './app/app.component.html', styleUrls: ['./app/styles/styles.css'] }) export class AppComponent { } - app.component.html
<!DOCTYPE html> <html> <head> <title></title> <meta charset="utf-8" /> </head> <body> <h3>Hello world with Angular2.</h3> </body> </html> - app.component.css
html { overflow - y: scroll; overflow - x: hidden; } main { position: relative; padding - top: 60 px; } h1 { color: red; } h3 { color: green; } - Add folder styles inside app folder and create the following style file inside it.
styles.css (It contains minimal styles, you may add others based on your requirement.)/* Master Styles */ h1 { color: #369; font-family: Arial, Helvetica, sans-serif; font-size: 250%; } h2, h3 { color: #444; font-family: Arial, Helvetica, sans-serif; font-weight: lighter; } body { margin: 2em; } body, input[text], button { color: #888; font-family: Cambria, Georgia; } /* everywhere else */ * { font-family: Arial, Helvetica, sans-serif; }
Now, let’s add index.html page in the root project with all the required references of app module, node modules, and add component.
index.html<!DOCTYPE html> <html> <head> <title></title> <meta charset="utf-8" /> <meta name="viewport" content="width=device-width, initial-scale=1"> <link href="//maxcdn.bootstrapcdn.com/bootstrap/3.3.7/css/bootstrap.min.css" rel="stylesheet" /> <link href="app/styles/styles.css" rel="stylesheet" /> <!-- Polyfill(s) for older browsers --> <script src="node_modules/core-js/client/shim.min.js"></script> <script src="node_modules/zone.js/dist/zone.js"></script> <script src="node_modules/reflect-metadata/Reflect.js"></script> <script src="node_modules/systemjs/dist/system.src.js"></script> <!-- Configure SystemJS --> <script src="systemjs.config.js"></script> <script> System.import('app').catch(function(err) { console.error(err); }); </script> </head> <body> <header class="navbar navbar-inner navbar-fixed-top"> <nav class="container"> <div class="navbar-header"> <span class="app-title">Sample Angular2 App</span> </div> </nav> </header> <main class="container"> <my-app>Loading...</my-app> <br /><br /> </main> </body> </html>
Installing node_modules
Now we need to install node_module in our project directory (i.e, angular2-getting-started) by following steps.
- Go to https://nodejs.org/en/download/ and download Windows Installer (.msi) file.
- Once downloaded the installer, install it on your system.
- Go to Run and open the command prompt.
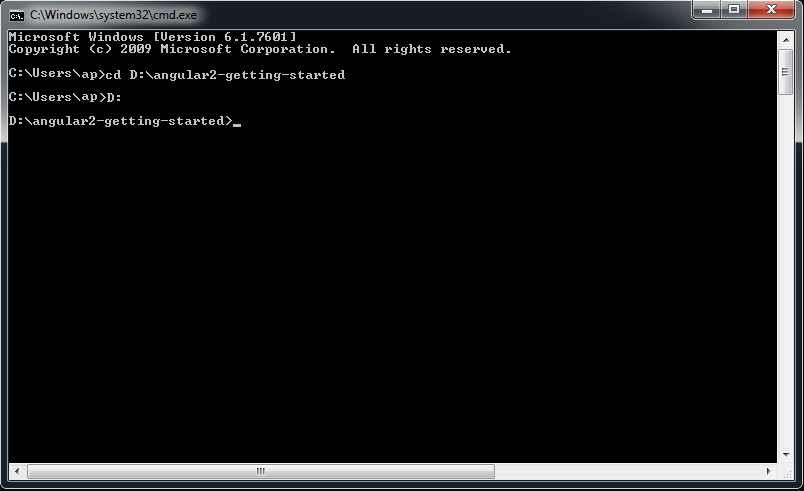
- Change the current directory to the path where we have created our website using Visual Studio.
The commands that I have run are shown in the following image.
Now to install npm_modules in our website run the following command. Before running this command, please make sure that nodejs installer has been installed in Step 1.npm install
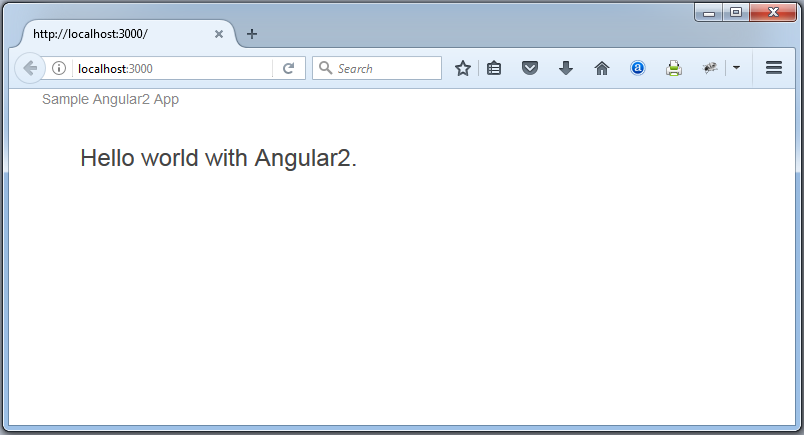
Once the above command gets executed, refresh the website in Visual Studio and you'll notice that node_modules folder gets added in the website. Also keep the Command Prompt open in the background.Now run following command and you'll see the application running in your browser.
npm start
You'll see the following output in browser.


0 Comment(s)