"Creating Setup for Windows Application using Visual Studio 2013"
To create setup using visual studio 2013 you should have Visual Studio Installer, else you can download this extension from: Visual Studio Extension Gallery
After downloading this extension you will get an option "Visual Studio Installer" under "Other Project Types" Menu option in Visual Studio 2013.
Step 1: Create a windows application.
Step 2: Now right click on the solution and goto add new project.
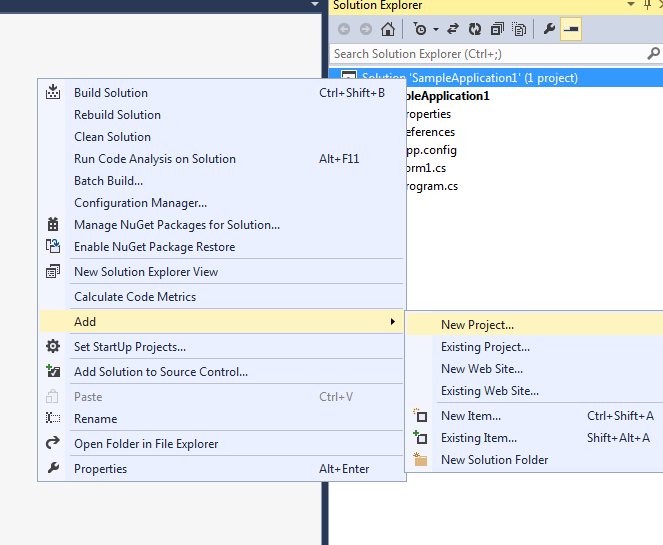
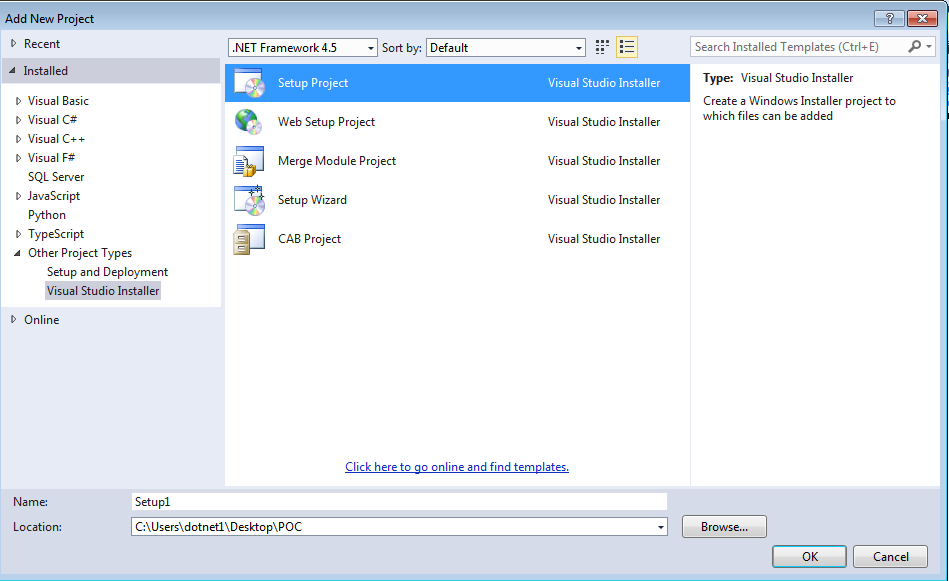
Step 3: Select Visual Studio Installer under Other Project Types menu option. Select Setup Project on right hand side, Name the project and click ok.
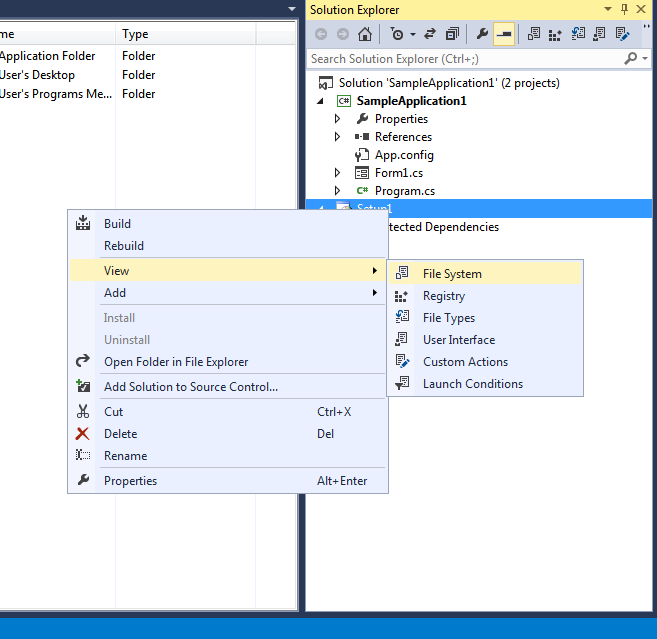
Step 4: Right click on the setup project just added, goto view and select File System.
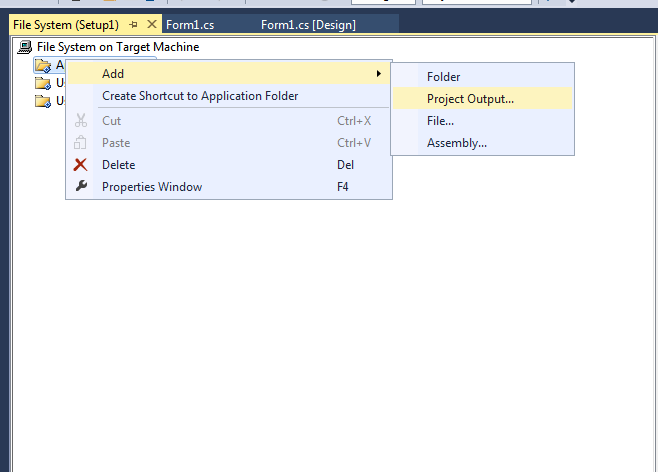
Step 5: Right click on the Application Folder >> Add >> Project Output.
Step 6: This will give you the Add Project Output Group window. Select the Project for which the setup is to be created,Select primary output and click OK.
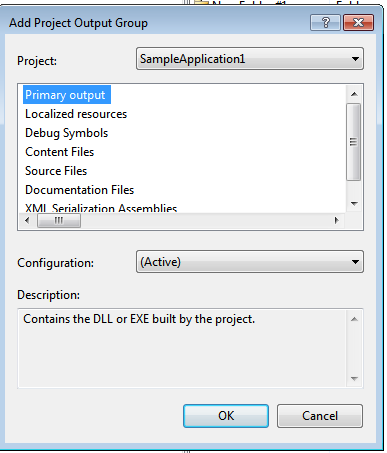
Step 7: Now Primary Output file will be added under the Setup project, you can now add various features to your setup file such as order of the screens to be displayed while installation license agreement to be displayed, etc.
Step 8: You can do this by right click on the Setup project >> View >> User Interface this will show a Folder structure on the left side.
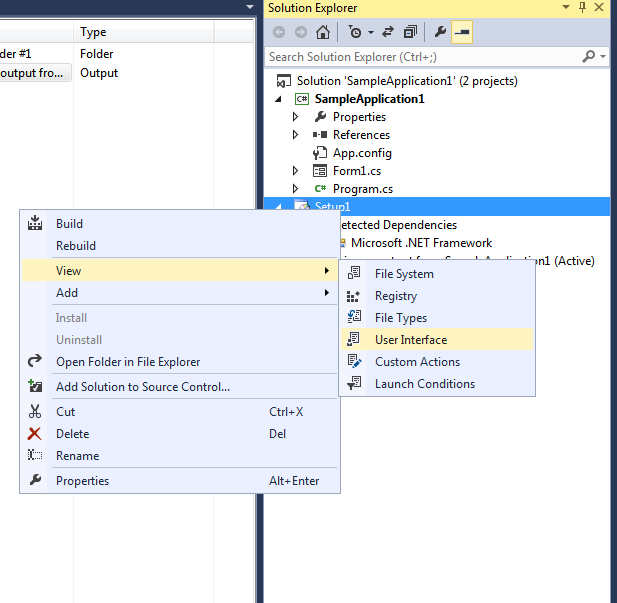
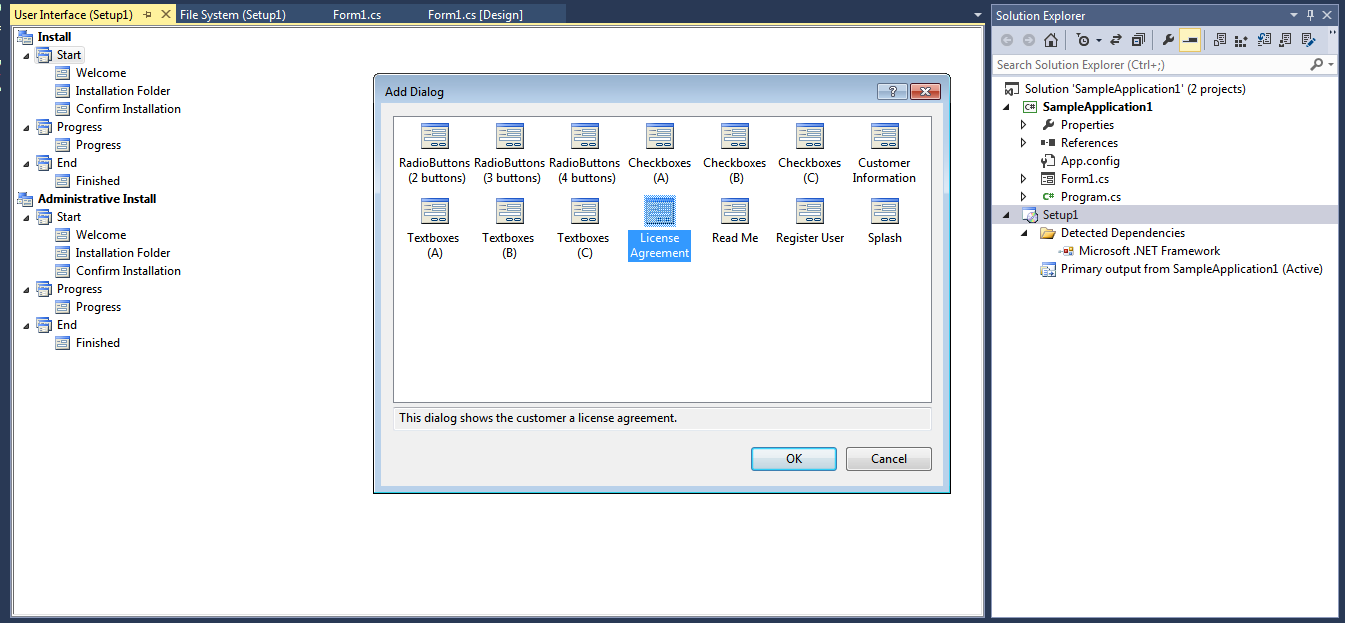
Step 9: After editing all these functionalities as per the requirement, Right click on the Setup project and click Build.
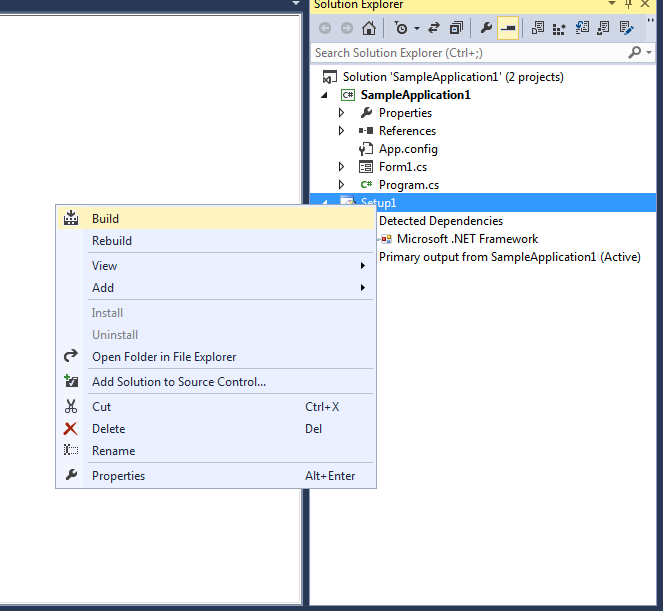
Step 10: Your setup is ready, you can get it from the debug folder inside the application.
0 Comment(s)