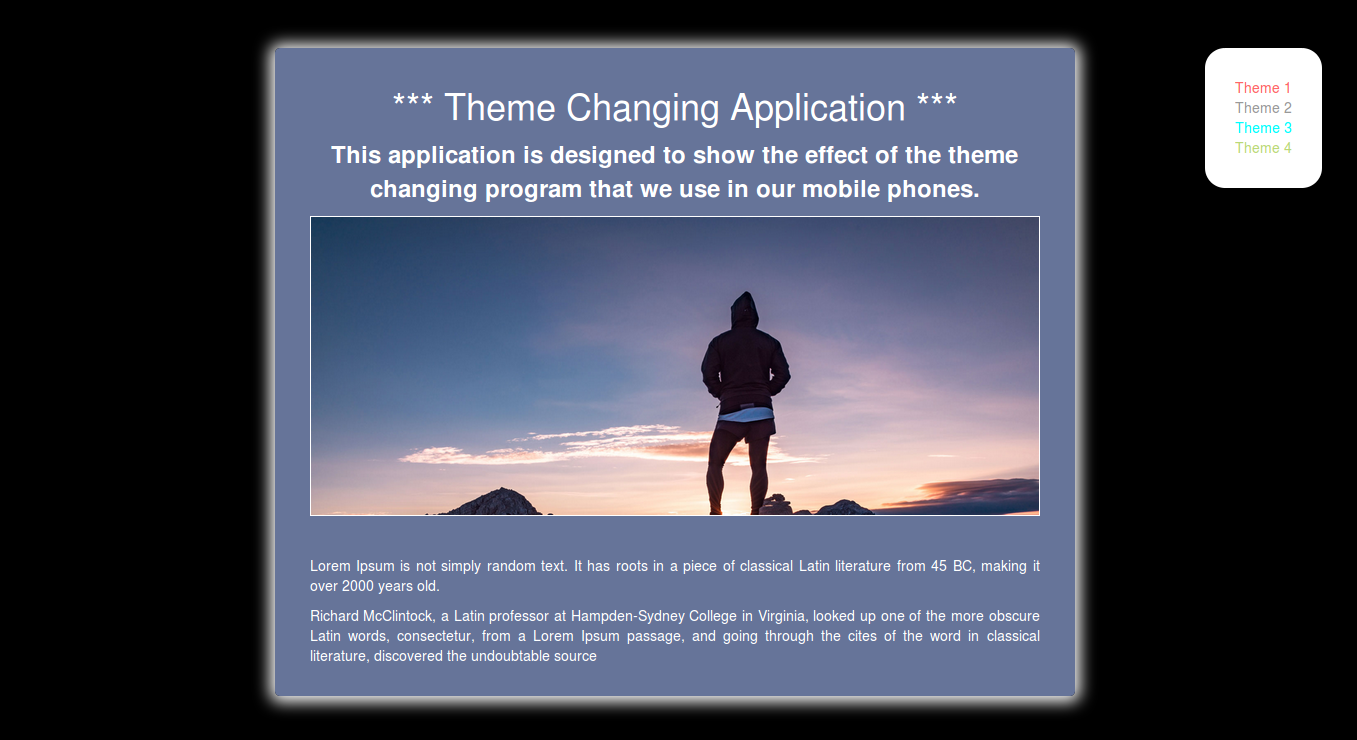
Hello Readers! In this blog we will be creating an application through which we can change the theme of a device. For an example we can consider a mobile theme application. In mobile, when we select particular theme the settings changes according to that selected theme like background color, text-styles, font-styles, images, etc. In this application we will be doing the similar work, on selecting a particular theme the background color and the image will change according to the theme. And will be doing this by using simple css and jquery. So, let's start!!
Step 1 : Your are required to create an HTML file and copy the following code to it.
<div class="listView">
		<ul>
			<li data-image="images/1.jpg" class="pink" data-color="#ff6666"><a href="javascript:;">Theme 1</a></li>
			<li data-image="images/2.jpg" class="grey" data-color="#999"><a href="javascript:;">Theme 2</a></li>
			<li data-image="images/3.jpg" class="aqua" data-color="#128ED8"><a href="javascript:;">Theme 3</a></li>
			<li data-image="images/4.jpg" class="light-green" data-color="#BAD877"><a href="javascript:;">Theme 4</a></li>
		</ul>
	</div>
	<div class="container">
		<div class="heading">
			<h2> *** Theme Changing Application ***</h2>
			<p>This application is designed to show the effect of the theme changing program that we use in our mobile phones.</p>
			<img src="images/1.jpg">
		</div>
		<div class="textContent">
			<p>Lorem Ipsum is not simply random text. It has roots in a piece of classical Latin literature from 45 BC, making it over 2000 years old.</p>
			<p>Richard McClintock, a Latin professor at Hampden-Sydney College in Virginia, looked up one of the more obscure Latin words, consectetur, from a Lorem Ipsum passage, and going through the cites of the word in classical literature, discovered the undoubtable source</p>
		</div>
	</div>
Step 2: Give some style to your sheet.
*{
	text-decoration: none;
	list-style: none;
}
body{

	background: #000;
}
.container{
	margin-top: 60px;
	width: 800px;
	background: #667499;
	border-radius: 5px;
	box-shadow: 0px 1px 15px 5px #fff;
	color: #fff;
}
.heading{
	text-align: center;
	font-weight: bold;
	/* color: #fff; */
	padding: 20px;
}
.heading h2{
	font-size: 36px;
	/* color: #23B2D2; */
}
.heading p{
	/* color: #45D9E7; */
	font-size: 24px;
	/* text-align: justify; */
}
.heading img{
	width: 100%;
	border:1px solid #fff;
}
.textContent{
	padding: 20px;
}
.textContent p{
	text-align: justify;
}
.listView{
	position: absolute;
	right: 40px;
}
.listView ul{
	padding: 30px;
	background: #fff;
	border-radius:20px;
}

.pink a{
	color: #ff6666;
}
.grey a{
	color: #999;
}
.aqua a{
	color: #00FFFF;
}
.light-green a{
	color: #BAD877;
}
Step 3: The jquery code to add functionality
$(function(){

	$(".listView ul li").click(function(){

		var getValue = $(this).attr('data-color');
		console.log(getValue);

		$(".container").css("background", getValue);
		var imgbg = $(this).attr('data-image');
		$(".heading img").attr("src", imgbg);

	});
});
Note: you are required to add following links to your HTML file :
<meta charset="UTF-8">

<title>Theme Changer</title>

<!-- Latest compiled and minified CSS -->
<link rel="stylesheet" href="http://maxcdn.bootstrapcdn.com/bootstrap/3.3.7/css/bootstrap.min.css">

<!-- jQuery library -->
<script src="https://ajax.googleapis.com/ajax/libs/jquery/1.12.4/jquery.min.js"></script>

<!-- Latest compiled JavaScript -->
<script src="http://maxcdn.bootstrapcdn.com/bootstrap/3.3.7/js/bootstrap.min.js"></script

Happy Coding :)
0 Comment(s)