-
Token Based Authentication using Postman as Client and Web API 2 as Server
over 9 years ago
When we are going to develop a web application which contains restricted resources then we have major issue related to authentication and authorization for accessing those restricted resources. We all know the concept of cookie based authentication that is used to access the restricted resources of the same domain.
In this blog we discuss the token based authentication which supports the OAuth2 standard. This token based authentication is basically used when we want to access the restricted resources that are in different domian.i.e. not in same domain. In c#, microsoft web API 2 permit us to access the restricted resources using token based authentication.
We take an example to illustrate how to use a "Token Based Authentication using Postman as Client and Web API 2 as Server".
In this example we create a Web API project to provide an authentication server which returns a bearer token to client and holds a user list as a resources and send this data as a response to the client.
Follow the below step:
1. Firstly, we need to create a project using Asp.Net Web API template and select an Authentication option to Individual User Accounts.
2. Check whether our project contains a necessary dll such as OWIN, Identity, and OAuth or not. This dll is used to configure the Authentication Server automatically.
3. We need to install the packages to support cross origin resource sharing by using NuGet package manager (user can this package by writing cors).
4. Now, we need to add the following connection string in Web.config file.<connectionStrings> <add name="DefaultConnection" connectionString="Data Source=***;Initial Catalog=Users;User ID=sa;Password=***" providerName="System.Data.SqlClient" /> </connectionStrings>5. Create a new model User which contains a User information.
public class User
    {
        public int Id { get; set; }
        public string UserName { get; set; }
    }
6. Create a new controller with name User which contains a Get function to returns a list of predefined users information.
[Authorize]
        public List<User> Get()
        {
            List<User> UserList = new List<User>
            {
                new User{Id = 1, UserName = "Ankit Rawat" },
                new User{Id = 2, UserName = "Anita Negi"},
                new User{Id = 3, UserName = "Asha Singh"},
                new User{Id = 4, UserName = "Ashish Gupta" }
            };
            return UserList;
        }
In the above code we use a [Authorize] filter to filter the unauthorized user to access the action. It means whenever client want to access this user list then his/her need to pass the valid bearer token.
7. we have the default configuration for Authentication server which contains a below code:static Startup() { PublicClientId = "self"; UserManagerFactory = () => new UserManager<IdentityUser>(new UserStore<IdentityUser>()); OAuthOptions = new OAuthAuthorizationServerOptions { TokenEndpointPath = new PathString("/Token"), Provider = new ApplicationOAuthProvider(PublicClientId, UserManagerFactory), AuthorizeEndpointPath = new PathString("/api/Account/ExternalLogin"), AccessTokenExpireTimeSpan = TimeSpan.FromDays(14), AllowInsecureHttp = true }; }8. We have used the Register action which id defined inside the AccountController to create a new User in server database.
  [AllowAnonymous]
        [Route("Register")]
        public async Task<IHttpActionResult> Register(RegisterBindingModel model)
        {
            if (!ModelState.IsValid)
            {
                return BadRequest(ModelState);
            }
            IdentityUser user = new IdentityUser
            {
                UserName = model.UserName
            };
            IdentityResult result = await UserManager.CreateAsync(user, model.Password);
            IHttpActionResult errorResult = GetErrorResult(result);
            if (errorResult != null)
            {
                return errorResult;
            }
            return Ok();
        }
9. After that, We need to run the project by pressing a F5 and it will open a port. Now it will ready to serves a client request.
10. To make a request, we need open a postman and send a POST request to the server's Account controller to register a new user with username and password as a parameter. See the below snapshot.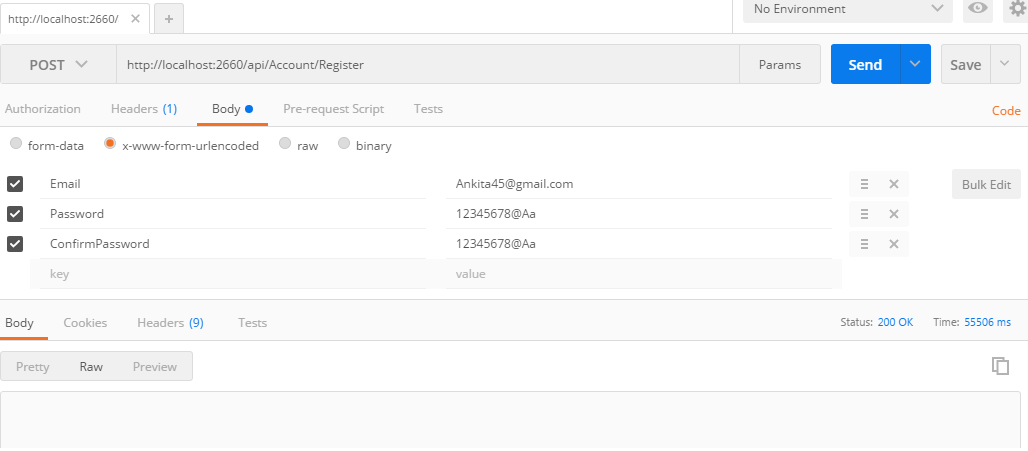
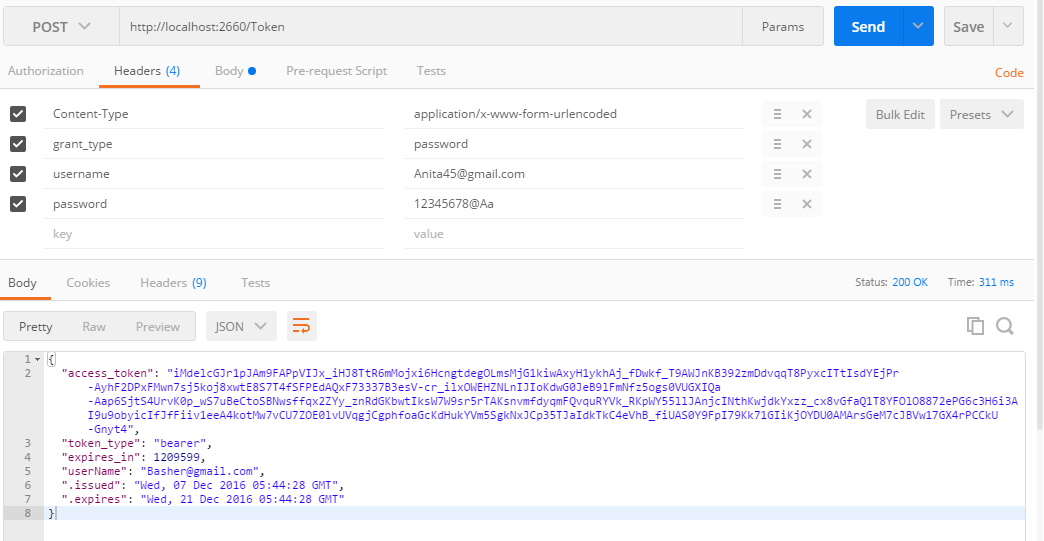
11. Now we need to send a POST request to server for the bearer token by using the newly created username and password as a parameter. It takes a additional parameter grant_type with the request value 'password' as shown in below snapshort.
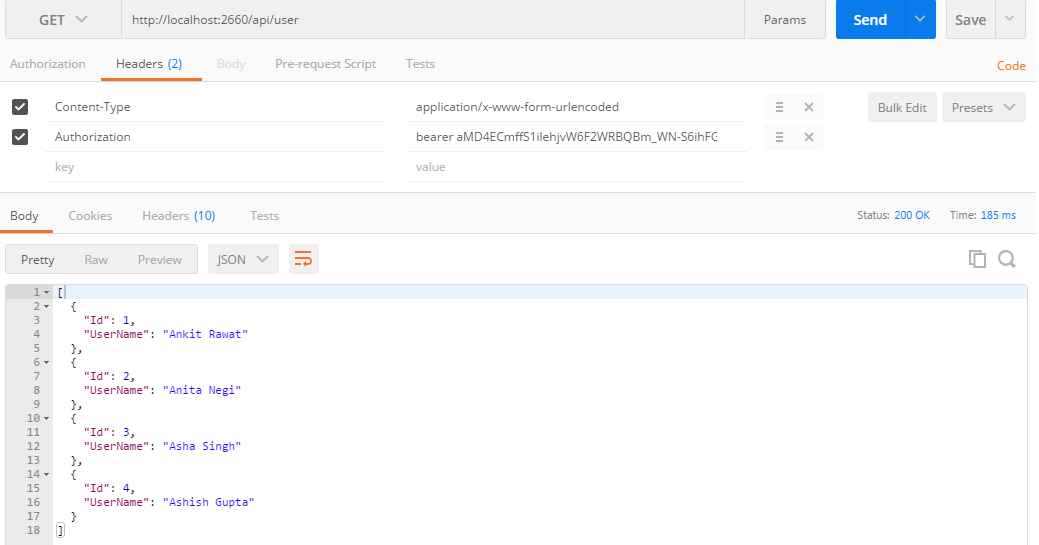
12. After getting the bearer token(access token), we send a request to server for the users list by passing a bearer token value in the header parameter named Authorization.


0 Comment(s)