-
Using commands in WPF
over 9 years ago
In the following article, we are going to see the use of commands in WPF MVVM application. Before we move on to see the actual implementation, it's necessary to understand why we use commands in WPF.
Commands are used to separate the UI components from the logic that needs to be executed on command invocation. In other words you can say that we don't write code behind logic for any of the events expected to be raised from the view page.
What I would do, when not using Commands
For example suppose in MainWindow.xaml, we have declared the following Button using the markup.
<Button Content="Click Me" Height="30" Click="Button_Click"/>Here you can see that we have registered a Click for it, which could be found in the code behind file MainWindow.xaml.cs.
private void Button_Click(object sender, RoutedEventArgs e)
{
    // Your logic goes here...
}
If we follow the same process, then it would be difficult to write the test cases for the code behind logic as they are tightly coupled with the view also it wouldn't be easier to write the reusable components.
How we are going to see Command in action
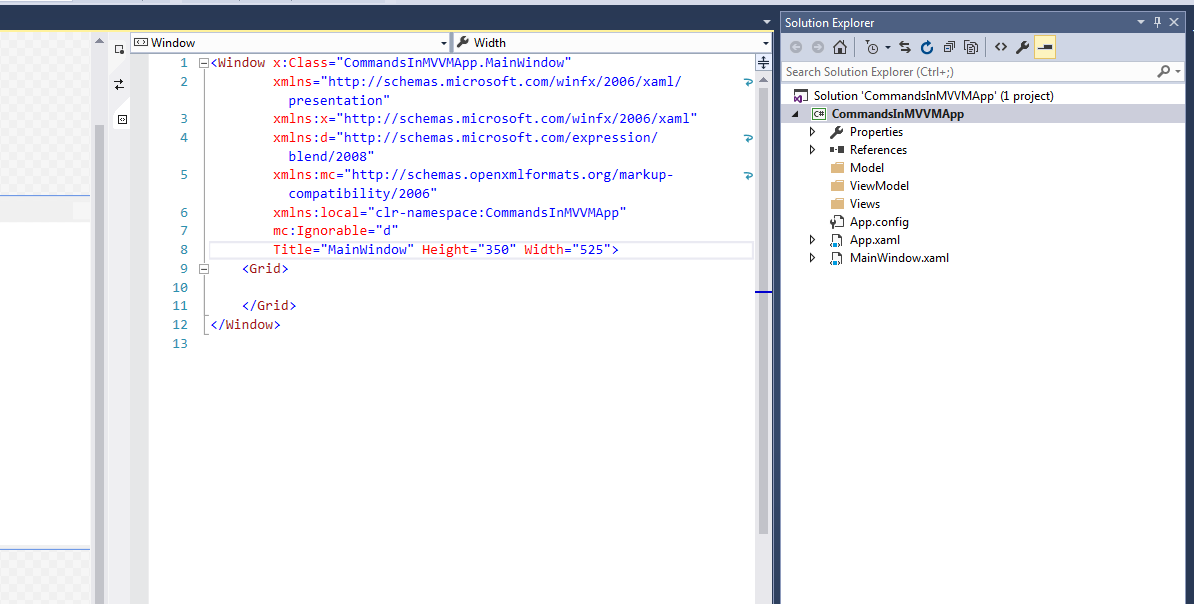
We will see an example of saving user details like name and age without binding any code behind event to the save button. Let's start creating a WPF MVVM application and name it as "CommandsInMVVMApp". Now add the three folders (Model, ViewModel, and Views) into your project, after which our application will look as shown in the following screenshot.
Let's start with our application step by step.
Step - 1
In the Model folder add a class file UserModel.cs and paste the following code in that file.
using System.ComponentModel;

namespace CommandsInMVVMApp.Model
{
    public class UserModel : INotifyPropertyChanged
    {
        private string _name;
        public string Name
        {
            get { return _name; }
            set
            {
                _name = value;
                RaisePropertyChanged("Name");
            }
        }
        private string _age;
        public string Age
        {
            get { return _age; }
            set
            {
                _age = value;
                RaisePropertyChanged("Age");
            }
        }
        protected void RaisePropertyChanged(string propertyName)
        {
            PropertyChangedEventHandler handler = PropertyChanged;
            if (handler != null)
            {
                handler(this, new PropertyChangedEventArgs(propertyName));
            }
        }
        public event PropertyChangedEventHandler PropertyChanged;
    }
}
Note: For the time being you may ignore interface INotifyPropertyChanged and its related implementation in UserModel.cs file.
Step - 2
Before we can start using command in our application, let's add a class file RelayCommand.cs inside ViewModel folder and paste following code inside it. This class provides us flexibility of binding commands directly to the ViewModels which prevent us from writing code in the views code behind. While using RelayCommand we need to provide two methods. The first one defines the method to be executed and second one defines whether the command can be executed.
using System;
using System.Windows.Input;

namespace CommandsInMVVMApp.ViewModel
{
    public class RelayCommand : ICommand
    {
        public RelayCommand(Action<object> execute) : this(execute, null)
        {
        }
        public RelayCommand(Action<object> execute, Predicate<object> canExecute)
        {
            if (execute == null)
                throw new ArgumentNullException("execute");
            _execute = execute;
            _canExecute = canExecute;
        }
        public bool CanExecute(object parameter)
        {
            return _canExecute == null ? true : _canExecute(parameter);
        }
        public event EventHandler CanExecuteChanged
        {
            add { CommandManager.RequerySuggested += value; }
            remove { CommandManager.RequerySuggested -= value; }
        }
        public void Execute(object parameter)
        {
            _execute(parameter);
        }
        private readonly Action<object> _execute;
        private readonly Predicate<object> _canExecute;
    }
}
Step - 3
Now in the same ViewModel folder add another class file UserViewModel.cs and paste the following code inside it.
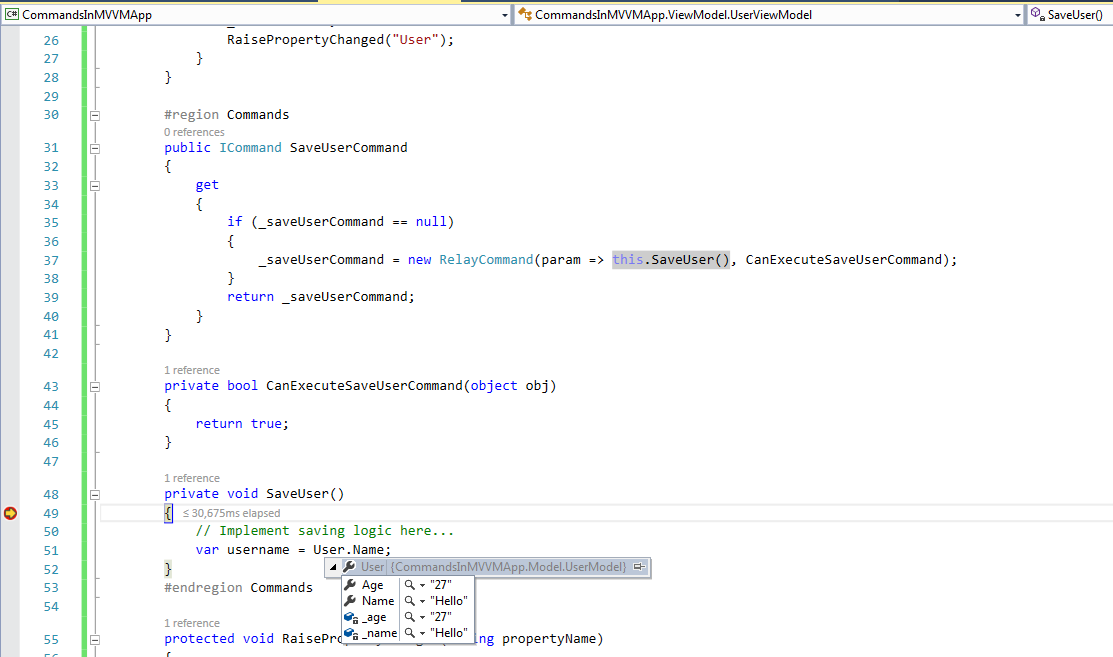
using CommandsInMVVMApp.Model;
using System.ComponentModel;
using System.Windows.Input;

namespace CommandsInMVVMApp.ViewModel
{
    public class UserViewModel : INotifyPropertyChanged
    {
        public UserViewModel()
        {
            User = new UserModel();
        }

        private UserModel _user;
        private ICommand _saveUserCommand;

        public UserModel User
        {
            get
            {
                return _user;
            }
            set
            {
                _user = value;
                RaisePropertyChanged("User");
            }
        }

        #region Commands
        public ICommand SaveUserCommand
        {
            get
            {
                if (_saveUserCommand == null)
                {
                    _saveUserCommand = new RelayCommand(param => this.SaveUser(), CanExecuteSaveUserCommand);
                }
                return _saveUserCommand;
            }
        }

        private bool CanExecuteSaveUserCommand(object obj)
        {
            return true;
        }

        private void SaveUser()
        {
            var user = User;
        }
        #endregion Commands

        protected void RaisePropertyChanged(string propertyName)
        {
            PropertyChangedEventHandler handler = PropertyChanged;
            if (handler != null)
            {
                handler(this, new PropertyChangedEventArgs(propertyName));
            }
        }
        public event PropertyChangedEventHandler PropertyChanged;
    }
}
Few points regarding the code shown above:
- You may ask why we have a User property defined in this ViewModel. It's because we will be dealing with a single object of type UserModel in our view because of the need of saving a single entry at a time. Had we need to show the list of users in View, we would also needed a list of UserModel type.
- Property User will be used in the view to bind with the Text property of TextBox controls as shown in the following sample.
<TextBox Text="{Binding User.Name, Mode=TwoWay}"/> - Instead of binding click events in code behind file to save user details, we would be binding the property SaveUserCommand to Command property of save button as shown in following sample.
<Button Content="Save" Command="{Binding SaveUserCommand}"/> -
Function SaveUser() will be accessing the User object with the values recceived from the View.
-
Function CanExecuteSaveUserCommand() is returning true in our case which shows that SaveUserCommand will be called everytime, but if you try to return false then it will simply disable the Save button in the UI. Remember we have set Command property of that button with the SaveUserCommand.
Step - 4
Let's add a new User Control (WPF) in Views folder and give it a name as UserAddView.xaml and paste the below code in xaml file.UserAddView.<UserControl x:Class="CommandsInMVVMApp.Views.UserAddView" xmlns="http://schemas.microsoft.com/winfx/2006/xaml/presentation" xmlns:x="http://schemas.microsoft.com/winfx/2006/xaml" xmlns:mc="http://schemas.openxmlformats.org/markup-compatibility/2006" xmlns:d="http://schemas.microsoft.com/expression/blend/2008" xmlns:local="clr-namespace:CommandsInMVVMApp.Views" mc:Ignorable="d" xmlns:ViewModel="clr-namespace:CommandsInMVVMApp.ViewModel" d:DesignHeight="300" d:DesignWidth="300"> <UserControl.Resources> <ViewModel:UserViewModel x:Key="UserViewModel"/> </UserControl.Resources> <Grid DataContext="{Binding Source={StaticResource UserViewModel}}" Width="250"> <Grid.RowDefinitions> <RowDefinition Height="100"/> <RowDefinition Height="100"/> <RowDefinition Height="100"/> </Grid.RowDefinitions> <Grid.ColumnDefinitions> <ColumnDefinition/> <ColumnDefinition/> </Grid.ColumnDefinitions> <TextBlock Grid.Row="0" Grid.Column="0" Text="Enter Name" Height="30"/> <TextBox Grid.Row="0" Grid.Column="1" Text="{Binding User.Name, Mode=TwoWay}" Height="30"/> <TextBlock Grid.Row="1" Grid.Column="0" Text="Enter Age" Height="30"/> <TextBox Grid.Row="1" Grid.Column="1" Text="{Binding User.Age, Mode=TwoWay}" Height="30"/> <Button Grid.Row="2" Grid.ColumnSpan="2" Content="Save" Command="{Binding SaveUserCommand}" Height="30"/> </Grid> </UserControl>
Few points regarding the code shown above:
- In the above xaml code, refer to the following line
xmlns:ViewModel="clr-namespace:CommandsInMVVMApp.ViewModel"
Here we have added a namespace "ViewModel" which points to the location where we have UserViewModel defined. Having defined this we would be able to specify the key with that ViewModel using the following syntax.
<UserControl.Resources> <ViewModel:UserViewModel x:Key="UserViewModel"/> </UserControl.Resources> -
Once we have defined the resource pointing to UserViewModel, we can use it to set the DataContext of Grid using the following syntax.
<Grid DataContext="{Binding Source={StaticResource UserViewModel}}" Width="250">
     ....
     ....
</Grid>
In this way we would be able to access the properties defined in that UserViewModel and can easily bind the available properties with the UI controls in View.
Step - 5
Now though we have created required components for Model, View and ViewModel but if you will try to run the application, you will not see anything in the screen. That's because by default MainWindow.xaml gets rendered as defined in the App.xaml file StartupUri="MainWindow.xaml".
So let's open MainWindow.xaml file and replace its content with following code.
<Window x:Class="CommandsInMVVMApp.MainWindow"
        xmlns="http://schemas.microsoft.com/winfx/2006/xaml/presentation"
        xmlns:x="http://schemas.microsoft.com/winfx/2006/xaml"
        xmlns:d="http://schemas.microsoft.com/expression/blend/2008"
        xmlns:mc="http://schemas.openxmlformats.org/markup-compatibility/2006"
        xmlns:local="clr-namespace:CommandsInMVVMApp"
        mc:Ignorable="d"
        xmlns:Views="clr-namespace:CommandsInMVVMApp.Views"
        Title="MainWindow" Height="350" Width="525">
    <Grid>
        <Views:UserAddView/>
    </Grid>
</Window>
In the above xaml code, refer to the following line
xmlns:Views="clr-namespace:CommandsInMVVMApp.Views"
Here we have added a namespace "Views" which points to the location where we have a View defined. Having defined this namespace now we would be able to specify the UserView and get it rendered inside MainWindow.xaml.
<Grid>
    <Views:UserAddView/>
</Grid>
Let's run our application and we will see the screen as follows where we can enter values for name and age.
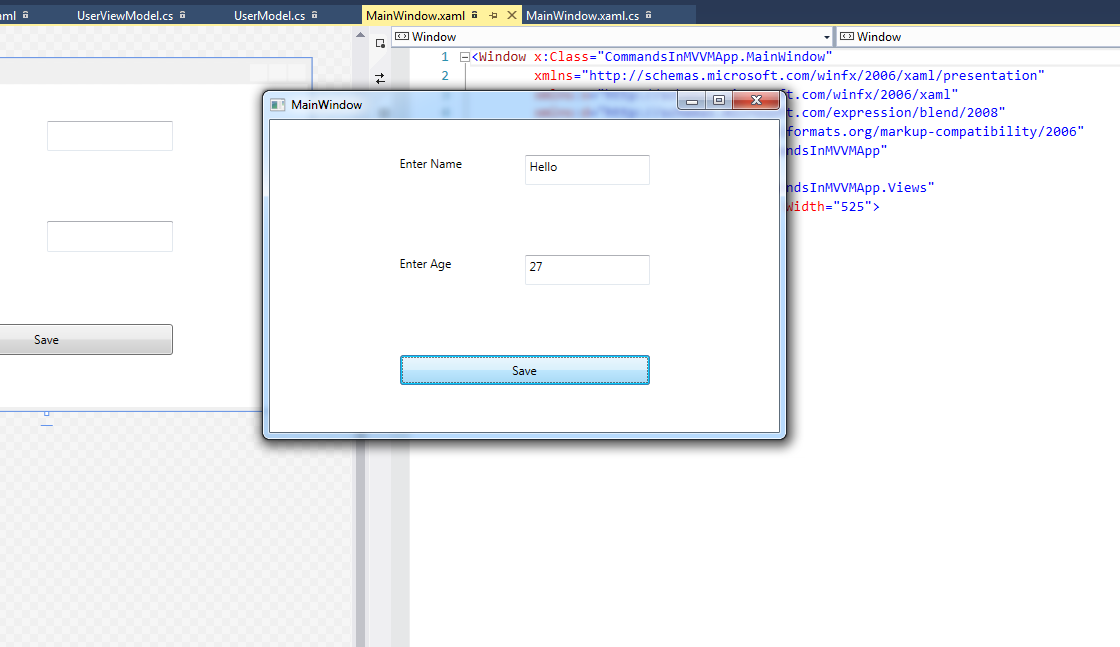
Before you proceed with saving user details, put a debugger on SaveUser() in UserViewModel class inside ViewModel folder to see what is received in that function. After providing values for name and age, click on submit and you will see that we are able to access the User object which have name and age properties assigned with the values entered in the View.

- You may ask why we have a User property defined in this ViewModel. It's because we will be dealing with a single object of type UserModel in our view because of the need of saving a single entry at a time. Had we need to show the list of users in View, we would also needed a list of UserModel type.


0 Comment(s)