-
An MVC application with Entity framework with Code First Approach
over 9 years ago
An MVC application with Entity framework with Code First Approach
Following steps are to be followed :
Step 1 : In visual studio 2015 create a new C# ASP.NET Web project named Student_Management_System. Select the MVC template option in new ASP.NET Project dialog box and then click ok to create project.
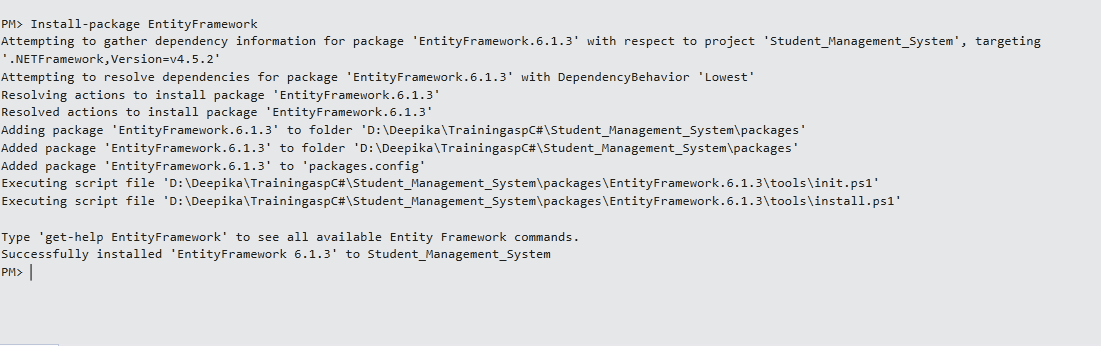
Step 2 : For an mvc application with entity framework,an installation of "Entity Framework" package is required. In visual studio 2015 from Tools menu select NuGet package Manager and then Package Manager Console. In the Package Manager Console window run command "Install-Package EntityFramework".
Step 3 : Create an entity class "Student" for the application i.e creating data model in Models folder.
using System.ComponentModel.DataAnnotations;

namespace Student_Management_System.Models
{
    public class Student
    {
        [Key]
        public int student_id { get; set; }

        [Required]
        [Display(Name = "First Name")]
        public string Fname { get; set; }

        [Required]
        [Display(Name = "Last Name")]
        public string Lname { get; set; }

        [Required]
        public string Email { get; set; }
    }
}
Step 4 : Creation of the Database Context class. Database Context class can be defined as the main class that is coordinating the functionality of Entity Framework for a given data model. First create a folder named DAL(Data Access layer) within the project then within that folder create context class named "studentcontext.cs".
using System.Data.Entity;
using Student_Management_System.Models;

namespace Student_Management_System.DAL
{
    public class studentcontext : DbContext
    {
        public studentcontext() : base("studentconnectionstring") { }   //the name of connectionstring which is added to Web.Config file
        public DbSet<Student> students { get; set; }
    }
}
The above created class is responsible for interacting with the database and for managing entity objects at runtime i.e from database objects are populated with data. DbSet in above code can be defined as an entity set that is responsible for creating,reading,updating and delete operations.If in above code name of connection string is not specified then entity framework assumes class name as connection string name.Step 5 : In this we are working with LocalDB which is defined as a lightweight version of the SQL Server Express Database Engine. Modify Web.Config file by adding connectionStrings element before the appSettings element. The following connectionstring is to be specified :-
 <connectionStrings>
    <add name="StudentConnString" connectionString="Data Source=(LocalDb)\MSSQLLocalDB;Initial Catalog=Student_management;Integrated Security=True" providerName="System.Data.SqlClient" />
  </connectionStrings>
Step 6 : Creating a controller with action methods and corresponding views.But before creating controller, build the project so that the model and context classes available to MVC controller scaffolding.
Within solution explorer right click on controllers folder then select add and click on New Scaffolded Item. Select option MVC 5 Controller with views, using Entity Framework in the Add Scaffold dialog box.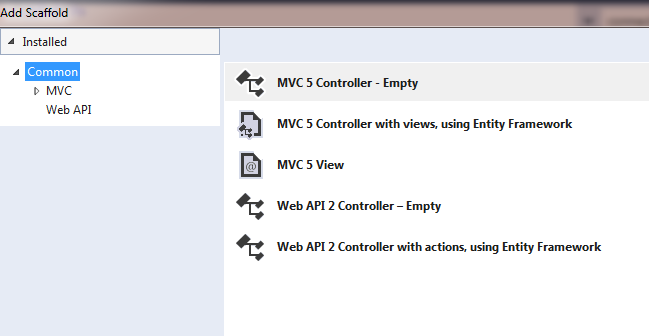
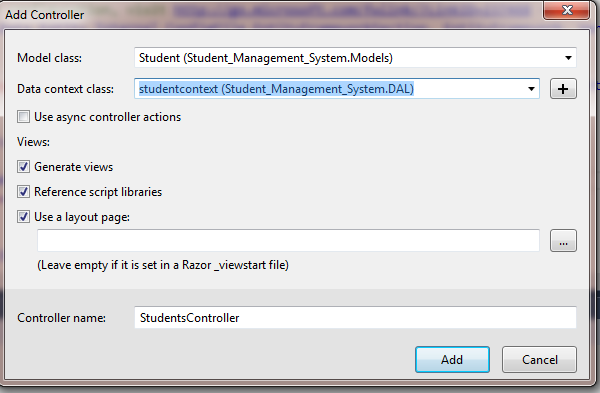
Make the following selections in Add Controller dialog box, and then click Add:
Following is the controller which is automatically created with corresponding views :-
using System;
using System.Collections.Generic;
using System.Data;
using System.Data.Entity;
using System.Linq;
using System.Net;
using System.Web;
using System.Web.Mvc;
using Student_Management_System.DAL;
using Student_Management_System.Models;

namespace Student_Management_System.Controllers
{
    public class StudentsController : Controller
    {
        private studentcontext db = new studentcontext();

        // GET: Students
        public ActionResult Index()
        {
            return View(db.students.ToList());
        }

        // GET: Students/Details/5
        public ActionResult Details(int? id)
        {
            if (id == null)
            {
                return new HttpStatusCodeResult(HttpStatusCode.BadRequest);
            }
            Student student = db.students.Find(id);
            if (student == null)
            {
                return HttpNotFound();
            }
            return View(student);
        }

        // GET: Students/Create
        public ActionResult Create()
        {
            return View();
        }

        // POST: Students/Create
        // To protect from overposting attacks, please enable the specific properties you want to bind to, for
        // more details see http://go.microsoft.com/fwlink/?LinkId=317598.
        [HttpPost]
        [ValidateAntiForgeryToken]
        public ActionResult Create([Bind(Include = "student_id,Fname,Lname,Email")] Student student)
        {
            if (ModelState.IsValid)
            {
                db.students.Add(student);
                db.SaveChanges();
                return RedirectToAction("Index");
            }

            return View(student);
        }

        // GET: Students/Edit/5
        public ActionResult Edit(int? id)
        {
            if (id == null)
            {
                return new HttpStatusCodeResult(HttpStatusCode.BadRequest);
            }
            Student student = db.students.Find(id);
            if (student == null)
            {
                return HttpNotFound();
            }
            return View(student);
        }

        // POST: Students/Edit/5
        // To protect from overposting attacks, please enable the specific properties you want to bind to, for
        // more details see http://go.microsoft.com/fwlink/?LinkId=317598.
        [HttpPost]
        [ValidateAntiForgeryToken]
        public ActionResult Edit([Bind(Include = "student_id,Fname,Lname,Email")] Student student)
        {
            if (ModelState.IsValid)
            {
                db.Entry(student).State = EntityState.Modified;
                db.SaveChanges();
                return RedirectToAction("Index");
            }
            return View(student);
        }

        // GET: Students/Delete/5
        public ActionResult Delete(int? id)
        {
            if (id == null)
            {
                return new HttpStatusCodeResult(HttpStatusCode.BadRequest);
            }
            Student student = db.students.Find(id);
            if (student == null)
            {
                return HttpNotFound();
            }
            return View(student);
        }

        // POST: Students/Delete/5
        [HttpPost, ActionName("Delete")]
        [ValidateAntiForgeryToken]
        public ActionResult DeleteConfirmed(int id)
        {
            Student student = db.students.Find(id);
            db.students.Remove(student);
            db.SaveChanges();
            return RedirectToAction("Index");
        }

        protected override void Dispose(bool disposing)
        {
            if (disposing)
            {
                db.Dispose();
            }
            base.Dispose(disposing);
        }
    }
}
An example of Index view :-
@model IEnumerable<Student_Management_System.Models.Student>

@{
    ViewBag.Title = "Index";
}

<h2>Index</h2>

<p>
    @Html.ActionLink("Create New", "Create")
</p>
<table class="table">
    <tr>
        <th>
            @Html.DisplayNameFor(model => model.Fname)
        </th>
        <th>
            @Html.DisplayNameFor(model => model.Lname)
        </th>
        <th>
            @Html.DisplayNameFor(model => model.Email)
        </th>
        <th></th>
    </tr>

@foreach (var item in Model) {
    <tr>
        <td>
            @Html.DisplayFor(modelItem => item.Fname)
        </td>
        <td>
            @Html.DisplayFor(modelItem => item.Lname)
        </td>
        <td>
            @Html.DisplayFor(modelItem => item.Email)
        </td>
        <td>
            @Html.ActionLink("Edit", "Edit", new { id=item.student_id }) |
            @Html.ActionLink("Details", "Details", new { id=item.student_id }) |
            @Html.ActionLink("Delete", "Delete", new { id=item.student_id })
        </td>
    </tr>
}

</table>
Step 7 : Enable Code First Migrations
In Package Manager Console add following commands :-
enable-migrations : This command will be creating a Migrations folder in the project with Configuration.cs file in it. This file is editable for configuring migrations.This configuration class contains a seed method.

add-migration : This command generates database from scratch if command is hit for first time. It adds a file named "<timestamp>_filename.cs" in Migration folder. This file contains Up and Down method with Up method responsible for creating database tables corresponding to data model entity sets and Down deleting them. Whenever there is a change in data model entity sets this command is run creating a new file with new
name with new changed Up and Down method.
update-database : This command will update the database by running Up command and then run seed method for populating data from database. This process run automatically.

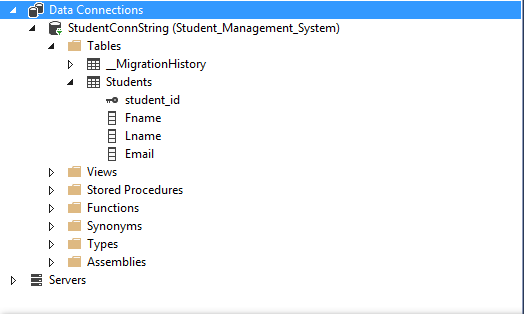
Database can be viewed in server explorer :
When application runs following screen is shown :
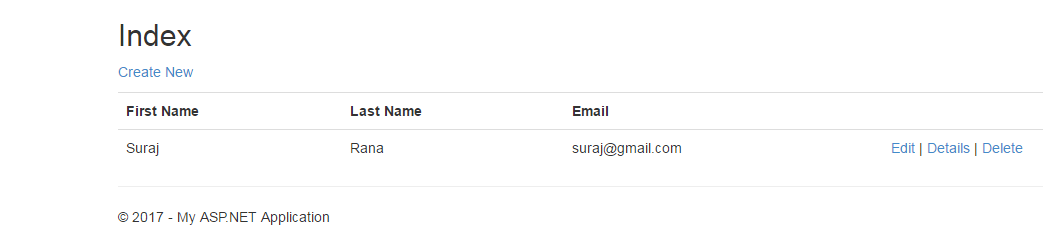
In above output students/index action is running. The above entry were created through students/create action.


0 Comment(s)