-
Creating a Terrain in Unity - Part 1 (Beginner)
almost 12 years ago
A brief introduction of Unity 3D
Unity is a cross-platform game engine which is used to make 2D and 3D games for mobile devices, web browsers, consoles and desktops. There are many useful features in Unity which includes Particles, Physics, Scripting, Pathfinding, Shaders and many more.
What I would like talk about today is Terrain. Unity has this amazing feature which you can use to make beautiful, complex and realistic terrain for you games. Let get right to it then.
Creating Terrain
Open Unity, Create a new project and check the tick in front of Terrain Assets.unitypackage in the Import section.
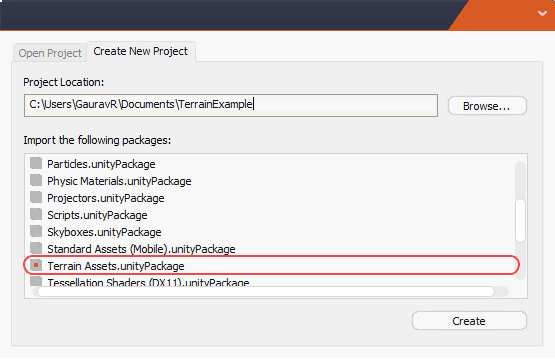
You can also import terrain in your existing project by importing the terrain package. This will add the components required for terrain generation.

Now go to Terrain menu and Create Terrain. We can adjust the size and various other parameters of Terrain by going to Terrain > Set Resolution.
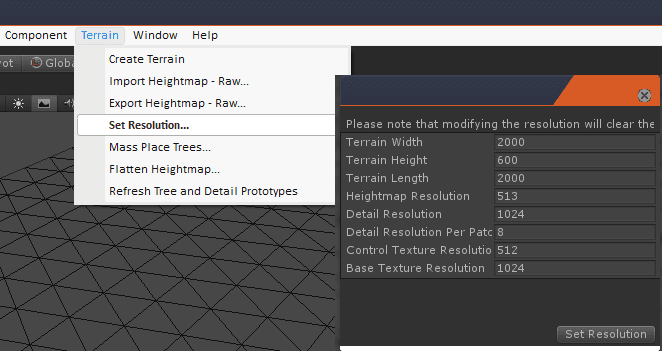
You will find lots of values there.
Terrain Width, Height and Length control the width height and length of the terrain.
HeightMap Resolution is the resolution for the height map.
Detail Resolution controls the resolution of the map for details like grass, rock, terrain etc. .
Control Texture Resolution is the resolution of the splat map used to define different detail maps that are painted upon the Terrain.
Base Texture Resolution is the resolution of the final composite image.
Editing Terrain
Select terrain and you will find options to edit the terrain which are very intuitive and fairly easy to use . The first 3 tools let you modify the height and depth of the terrain.
Select the first tool and click left mouse button and drag over the terrain. This will raise the height of terrain. Holding SHIFT while dragging will lower the height. There is wide variety of brush type to choose from and experiment with. Second tool is Paint Height Brush.
You can type in desired height and use the brush to paint the terrain. Also instead of typing in the height you can also sample height from existing terrain by holding SHIFT and clicking on the desired point on the terrain. There is another tool which allows you to soften the terrain and smoothen out any rough areas.

You can use these tools to make any type of detailed and complex terrains .
In next part of this tutorial we will take an in-depth look on how to add realism to a terrain by adding textures ,trees and various other effects like fog and lights.


-
almost 12 years ago
very helpful.. waiting for next one.. :)
-


1 Comment(s)