-
How to create a 3D logo on illustrator
over 9 years ago
These are the following steps to make a 3D logo.
Step 1: Once the new document and set the width and height of the art board.
Step 2 : Goto the ellipse tool and make the circle filled with radial gradient ( Grey tone are using in the circle ).

Step 3: Again make another circle. Now take a pen tool and Draw the shapes on the circle. See the below image for create the shapes.

Step 4: Now select the second circle and shapes, Goto the pathfinder panel and click on trim. Just delete the shapes on the circle. Here we have a basic structure of our logo. Fill the any color inside the circle to make a logo more attractive.

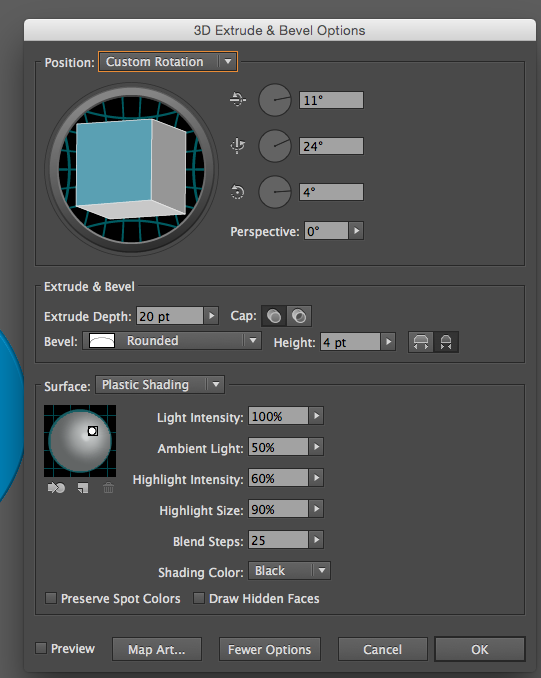
Step 5: Apply 3D effect on it. Select the logo and goto Effect > 3D > Extrude & Bevel. See the below image for set the value of 3d effects.
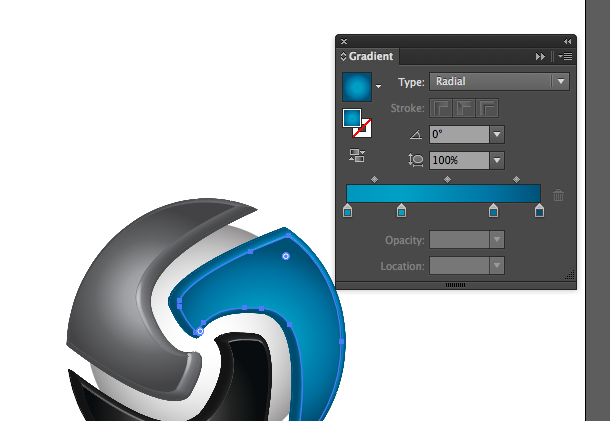
Step 6: Time to Expand the whole object. Select the logo and goto Object > Expand. Now select the Front parts of our logo and apply gradient on it to make logo more realistic. First we have select the blue part, goto gradient panel and apply on it. See the below image for apply the gradient.
This is the following Steps to make a 3D logo on illustrator.


-
over 9 years ago
Nice tutorial..
-

-
over 9 years ago
nice
-

2 Comment(s)