-
How to make 3D rings in illustrator
about 10 years ago
In this tutorial we'll make 3D rings.
Step 1: Open a new document. select the ellipse Tool (L) and make a ellipse with size 4px by 4px. Now fill the blue color inside the circle and no stroke.

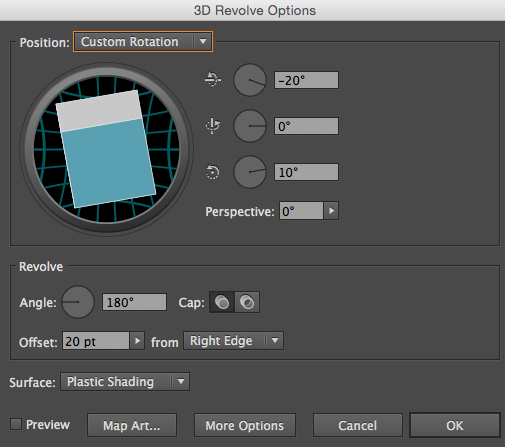
Step 2: Now apply 3D effect on ellipse. Select the ellipse and goto Effect > 3D > Revolve. Set the value to make a semicircle. See the below image to enter the value of 3D revolve.

Step 3: Now Select the semi ring and copy as shown in fig. use the alt key and drag the semi ring to make a duplicate ring.

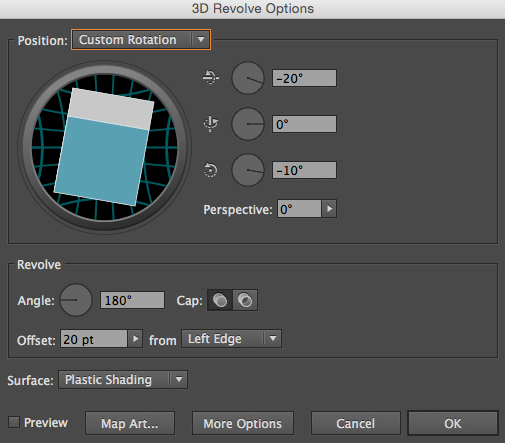
Step 4: Again open the 3D dialog box and Set the value as shown in fig. Change the value of Z- axis and Offset others values will be same as the first semi ring.

Step 5: You can join the face of the semi rings. Select the duplicate copy and place behind the original one. Make sure the faces of semi rings has properly join with each other.
Step 6: We have to create the duplicate rings. We'll select the rings and use the Alt key Drag the rings and Place behind the original one.
Step 7: We'll copy the rings 3 times. so select and Drag the rings.

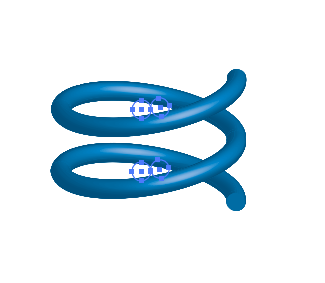
Here We make 3D Rings in illustrator


0 Comment(s)