-
Skinning a Character in Maya using Component Editor
over 12 years ago
Skinning a Character in Maya using Component Editor
Tutorial #1Intermediate
In the following tutorial we will learn the alternate way to skin the mesh in Maya apart from usual painting based skinning . We will use Mayas multipurpose Component Editor for this . You may ask why use this cumbersome method when we can just go ahead and paint skin weights and be done with it . My answer would be because of its simplicity and dead on accuracy . You just need to type in the numbers and you get yourself a skinned model . I use it mostly on low polygons character , or to fine tune the skinning while using the paint weight method .
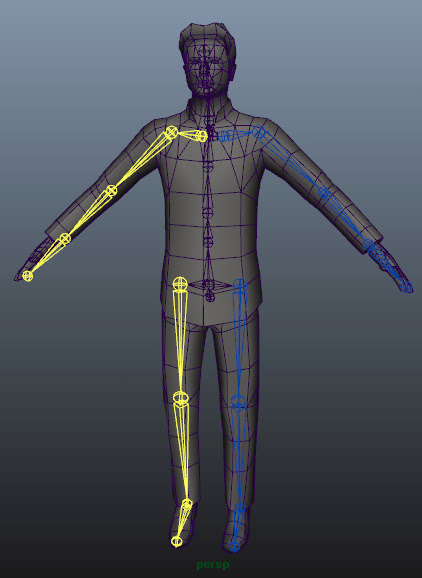
Okay , so you will need a rigged model for the following steps .
Always give proper name to the joints in the rig . it always a good habit to assign right names to the assets.
Now , Our first step would be to attach the rig to the mesh with help of Smooth Skin. Select the root joint of the rig and then add the mesh to the selection , then navigate to the Animation Menu Set > Skin > Bind Skin > Smooth Bind . Now here click on the the box next to the Smooth Skin option to get the Option Box for Smooth Bind .
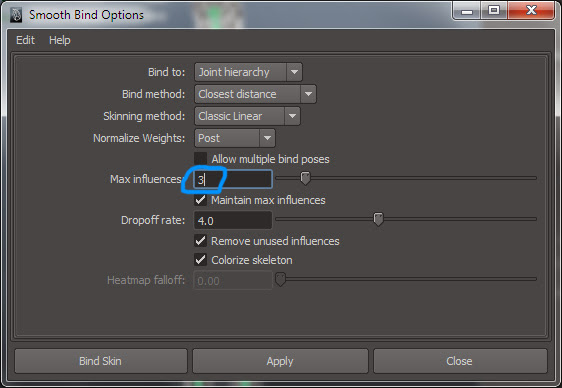
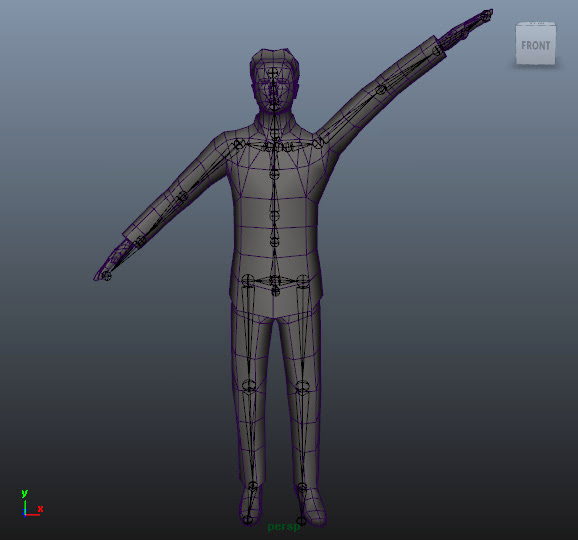
Set the Max influences to 3 . It is the max number of joints which can be bound to a vertex . For this example we wont need more than 3 . Press Bind Skin button to complete the process. Now we have a skinned model . Lets check it how it works .

Pretty bad huh !
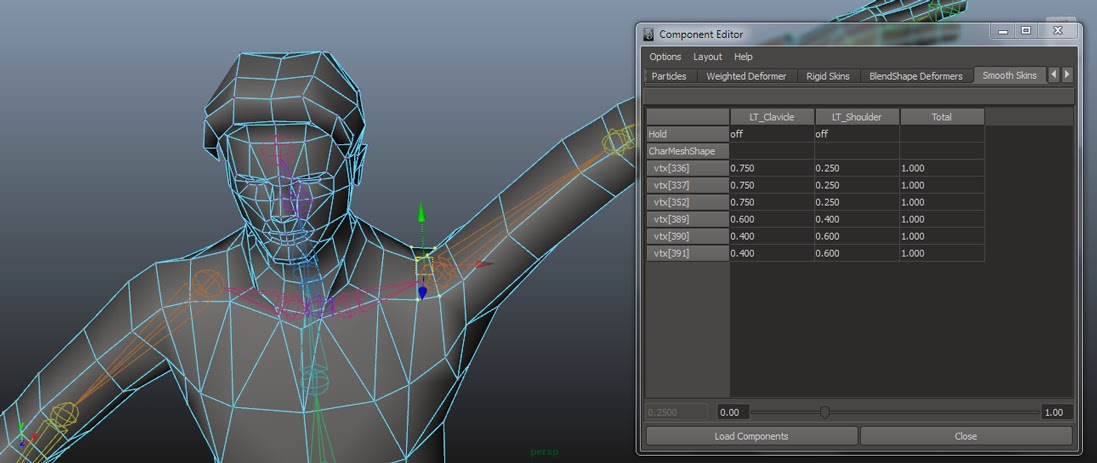
If you have placed the joints at the correct places then it will save you from lots of trouble. Now what we do is select the vertices around the arm pit region and assign them the weight of the correct joints. Select the vertices, now go to the Windows>General Editor>Component Editor. You will find few tabs on this window. Go to the one that says Smooth Skins.
Now enter the value under the joint name you want to assign the weight to . In the image below you can see that the I have assigned the full 1 weight to the LT_Shoulder , which the max weight that can be on a vertex .

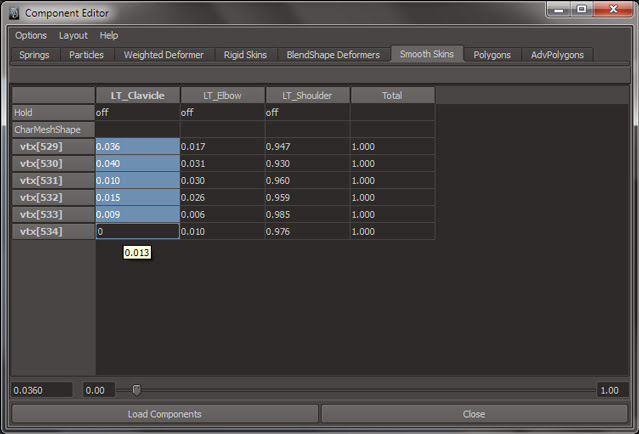
Now repeat the process over , select the vertices and assign the weights on the editor , remove the unwanted weights . To create a smooth bend you will need to balance out the weights between joints . See example below .
Here is the final result .
Repeat the same technique on the forearms , legs and thighs till you get a good result . Once you are done with the one side of the mesh , you can mirror the skin weights to get the same result on the opposite side . For that go to Skin>Edit Smooth Skin >Mirror Skin weights . Go to the option box and before mirroring the weights , assign the axis on which you want the mirror to happen . And thats it . You have a skinned model at your disposal now .
Feel free to contact me if you have any queries or better yet if you have a better way to do the same , let me know .


-
over 12 years ago
That's Interesting :)
-

-
over 12 years ago
Nice...M looking for this...thanks a lot...
-

-
over 12 years ago
Nice...M looking for this...thanks a lot...
-
-
over 12 years ago
Very interesting.. Helped me a lot.. !!!
-

4 Comment(s)